Give your tomatoes a boost with this tutorial.
Looking for vegetable gardening tips? This popular
YouTube video will teach you how to create a super starter fertilizer for your tomatoes. The ingredients are all common and affordable. You’ll notice some of the commenters complaining about the combined cost of the finished fertilizer mix, but keep in mind that this is a bulk batch for bulk tomato fertilizing. If you have an actual tomato farm, this makes sense, and might even save you money if it helps you to product a good crop. If not, just make a smaller batch! This will save you money!
Learn all there is to know about compost with a handy infographic.

Do you compost? If you don’t, this infographic will change your mind. As you’ll see, a single cubic yard of compost has an estimated worth of $562. That is what you would pay without it for fertilizer, organic matter, growth hormones for plants, and other gardening supplies. You’ll also learn the amazing benefits to the environment of using compost, which go far beyond your own garden. You’ll discover the optimum way to layer the ingredients in your compost bin, and finally you’ll get a quick guide which teaches you what you can and cannot compost. This is an incredible resource for a beginning gardener!
DIY Instructions and Project Credit: Fix
Find out if seeds are still good to plant.

If you have old seeds lying around that you’re thinking of planting, you don’t want to waste a lot of time if you’re not going to get them to grow. One easy way to check to make sure you are not wasting time is by using a wet paper towel. Place the wet paper towel somewhere warm, for example on top of your clothes dryer. Set a few seeds on top, and see what happens over the next few days. If you see sprouting, then go ahead and plant the batch! If you don’t, the window has probably passed. This is a great time saver, and it can be a cost saver too. You might be surprised which seeds are still good—some last for years!
DIY Instructions and Project Credit: Food52
Engrave stones for your garden.
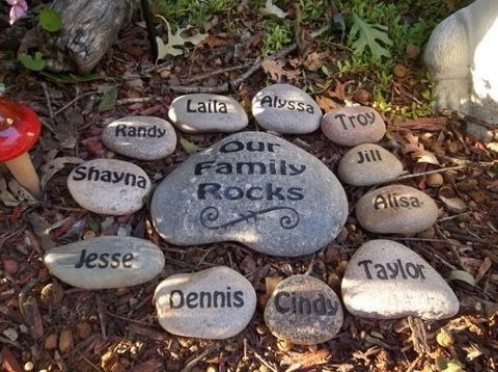
Remember the painted river rocks that I shared with you earlier? Another great way to write on stones is to engrave in them directly. Look at these adorable family rocks (cute pun too!). You could engrave anything on your garden rocks, and could even use them as plant markers.
Repurpose toilet paper rolls for seedling starters.
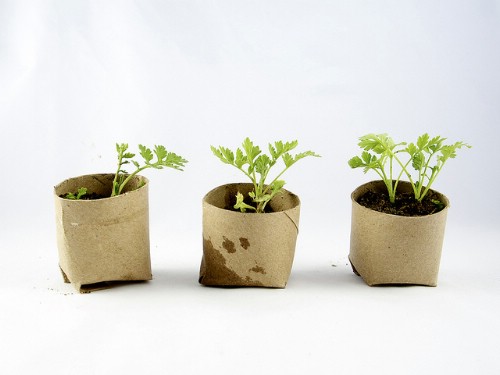
These are awesome! Everyone has toilet paper rolls in their home. Start accumulating the empty rolls instead of throwing them away, and you will have a great material for seedling starters. It looks to be a simple matter of making a couple of cuts and folding the bottom part under and taping it. They are the perfect size!
Check out this amazing vegetable growing cheat sheet.

This amazing infographic will get you started with vegetable growing the right away! Find out which veggies are best to grow in a plot garden, and which are best for a patio garden. Scroll down and you will learn about common pests that threaten vegetables, as well as tips for growing specific veggies. Find out which plants require direct sun for sowing, what spacing they need, how long it takes them to germinate and mature, and much, much more. You will also learn the right time to plant seeds and harvest your vegetables. Finally, a guide to companion planting will teach you which plants to place together to make the best use of your space and discourage pests.
Label your plants with chopsticks.
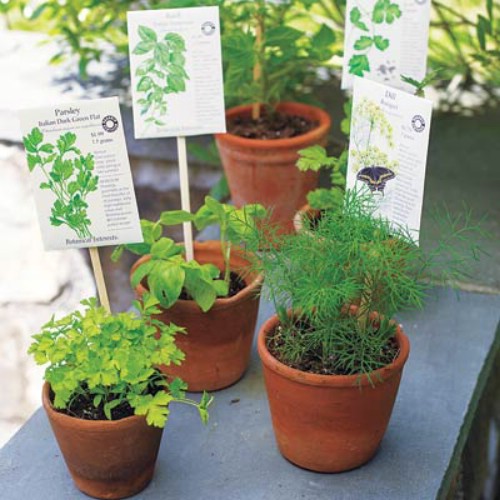
Here is a fast, easy and cheap way to label your plants. Next time you head out to pick up Chinese takeout, don’t throw away those cheap chopsticks. Instead, wash them off and save them. You can attach seed packets to them and then stick them in the soil next to their respective plants. It really does not get any simpler than that.
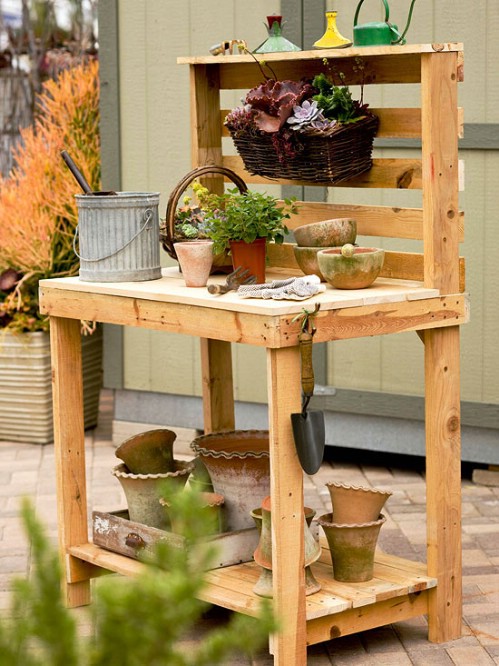
Turn a pallet into a planter.
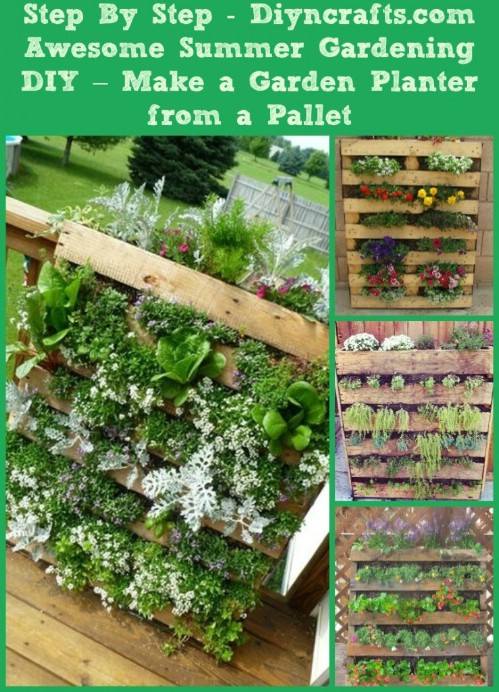
Pallets are
amazing things. You can use them all over your house or yard for a hundred purposes. One way you can repurpose them which is both beautiful and useful is to turn them into planters in your garden! This is a very easy project, and it’s delightfully cheap. Another great thing about it is that it is great for conserving space. The vertical design makes it perfect for any location. Even if you have a very small yard or patio area where you can garden, you can grow a large number of plants this way.
Use broken pots to create amazing fairy gardens.
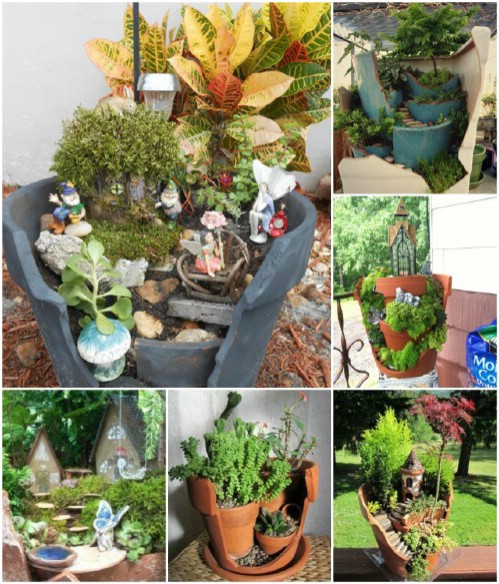
You know those little fairy houses you can buy to put in your garden? If you want to create an amazing fairy garden in a pot, just start with a broken one. On
this link, you will see exactly how to do it. You just break off a large piece of the side, add some soil to the broken pot, place the piece inside at a slight angle, and then fill in and add some small chips of ceramic (say, from the same pot, or another) to form stairs. Then just add plants and fairy houses and whatever you’d like to your heart’s content. There are tons of incredible examples of what you could do on that page! As you will see, there are many variations on this theme. The idea is just to create a set of terraces and turn them into something magical.
Make a water sprinkler out of a plastic bottle.
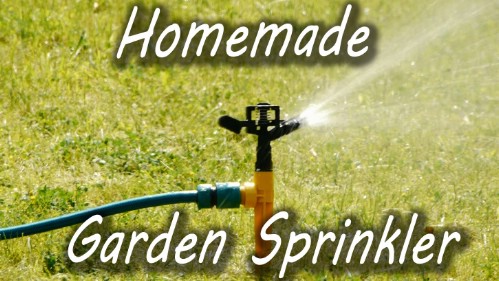
Here is yet another use for an old plastic bottle in your garden. Make a line of holes around the length of the bottle with a thumbtack, rotate, and repeat several times. Push a hose inside, put some tape on to seal the connection, and turn the water on. Find out more by watching the
video at LifeHacker.
Amazing DIY birdfeeders.
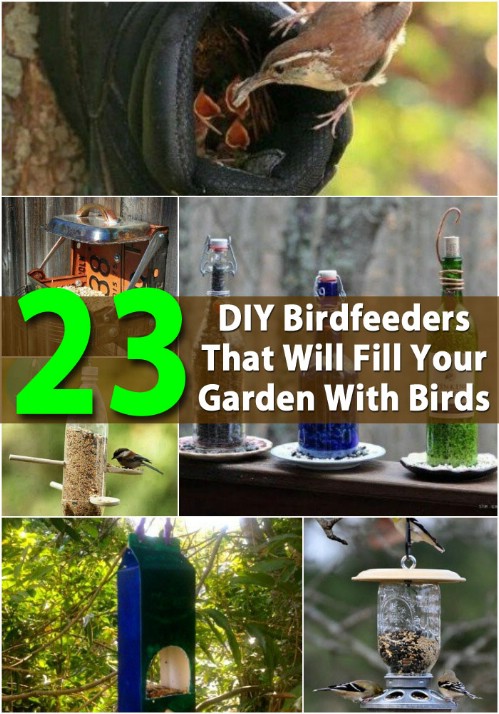
Did you know it’s easy to make your own birdfeeder with stuff you probably already have around the house?
Here we have collected lots of beautiful and creative examples for you to check out. I love the first one with the teacup and the saucer. Very cute, and even provides a little shade. Other birdfeeders are made with teacups, kettles, shoes, and more! Some of these can also double as birdhouse ideas.
Transform an old wheel into a gorgeous mosaic planter.
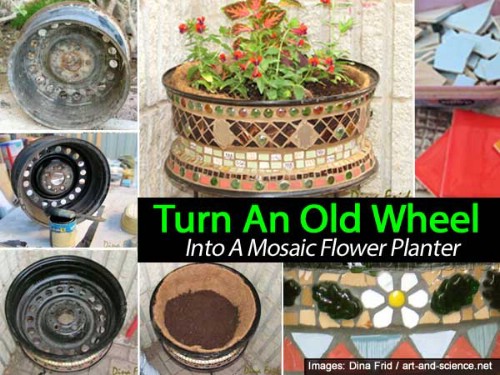
The transformation in this project is just stunning! Look at the left-hand side, and you’ll see how this elegant mosaic planter started life as an old wheel. If not for the title and subject of the project, I probably would not have even made the connection and realized that the planter was made from the wheel! It looks completely different. What an amazing project, perfect for the artistically-minded gardener. What’s cool is that the wheel actually has a functional purpose beyond just serving as a vessel; the wheels provide perfect drainage!
Convert an old pair of jeans into a garden apron.

Wish you had something to wear out in the garden that would keep your clothes clean while you’re kneeling down in the dirt? If you have an old pair of jeans lying around, you can turn them into a garden apron in seconds, using just a pair of scissors! Check out the
video. What a way to save time and money!
Attract hummingbirds to your garden.
Hummingbirds are gorgeous and so much fun to watch as they hover and flit from blossom to blossom, but they can be elusive creatures. You could buy a hummingbird feeder, but a lot of gardeners don’t like them for the simple reason that the food inside attracts ants (being mostly made of sugar). Here’s another way to draw hummingbirds to your garden. Just plant flowers which attract hummingbirds!
This link will give you fifteen great options. These are all beautiful plants too, and will add color to your garden!
Beautify your planters.
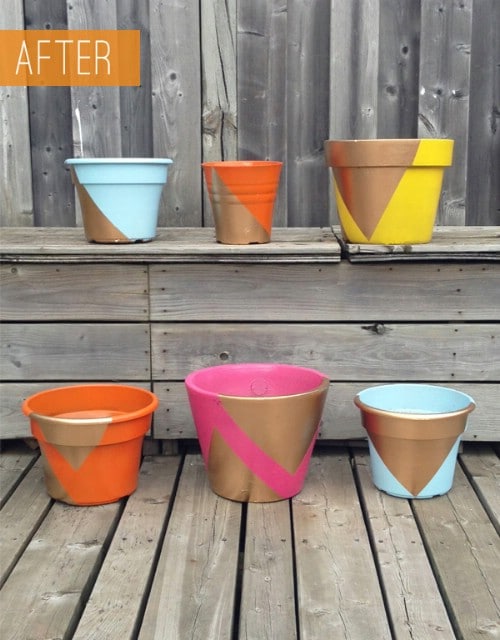
Have some old planters which are still useful, but not a whole lot of fun to look at? This
project from The Sweet Escape is a fun, quick, and easy way to transform your planters into something beautiful. Instead of just spray painting them with solid colors (still, not a bad idea on its own), this project allows you to apply simple patterns and more than one color to each planter. The final result is stunning. The metallic paint adds some real sparkle and shine.
Stop leaking planters from getting dirt everywhere with coffee filters.
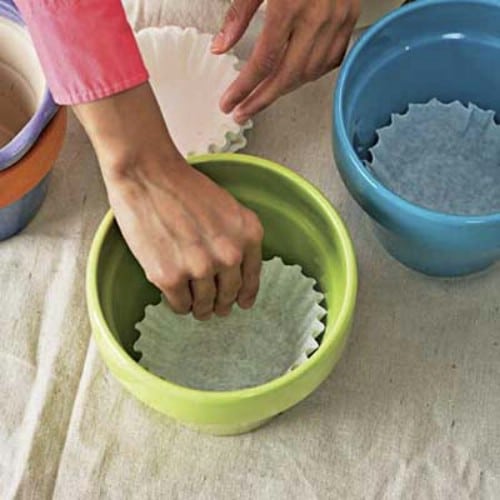
Don’t you hate when you pick up a planter to move it, only to have dirt leak out the bottom? Even if you have a tray to catch leakage, it can still be a messy process. One way you can stop this without affecting the drainage of your houseplants is to add a coffee filter to the bottom of each pot. This is mostly a problem with young plants that do not yet have highly developed root systems. You can use old coffee filters—not need to spring for new ones. They do biodegrade, but usually you don’t have to replace them, since the plant roots will finish developing, and then the soil won’t leak so much.
Easy watering hack with wine bottles.
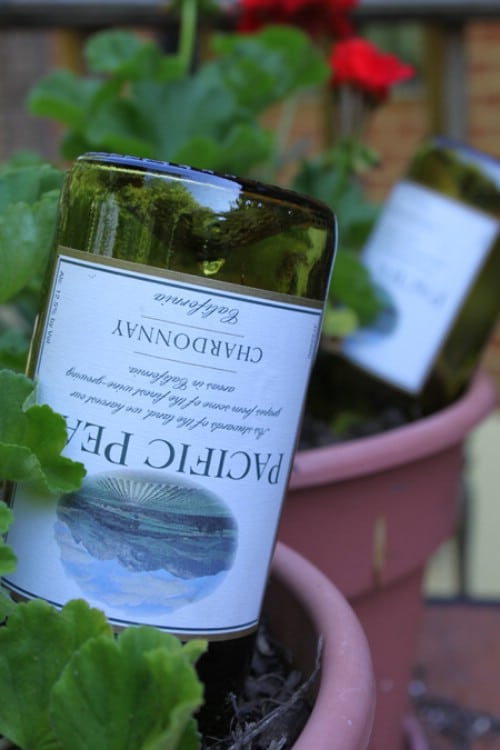
Looking for an easy way to water your garden and keep the soil moist during those hot months when water evaporates the moment it touches the planter? Here’s a quick and easy hack. Simple grab an empty wine bottle or beer bottle, fill it up with water, flip it upside down, and then quickly jam it down inside the planter. The water will slowly transfer from the bottle to the soil; it could save you days of watering. Watch a video about it
here.
Turn a bunch of cement blocks into a raised garden bed.
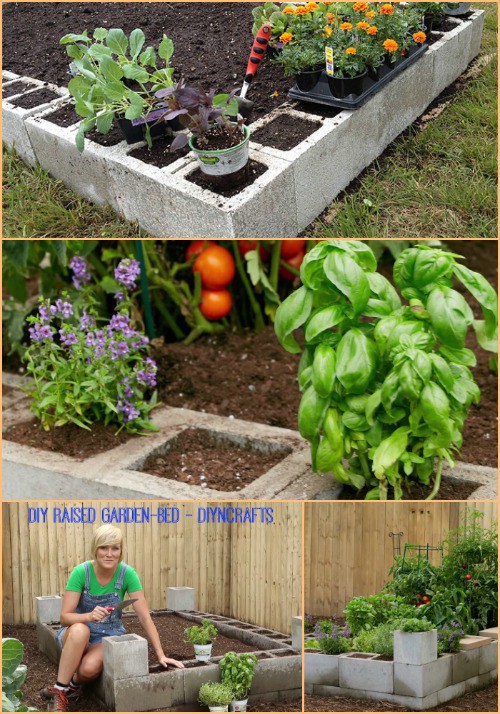
Raised garden beds are awesome. They look nice, and they can be easier to work with if you have back problems and don’t want to have to bend over as far to tend your plants. One easy way to create one is using a bunch of cement blocks. This works great for square foot gardening too. Each block essentially is already serving as a planter, and then you can put whatever else you want in the middle.
Turn a hanging pocket organizer into a vertical garden.

This idea is genius! That’s a hanging pocket organizer, the same kind that you can tack to the inside of your closet door to store your shoes. You can purchase one at an organizing store for cheap, and hang it outside and use each pocket for plants. Not only is this a great deterrent to cats and other pests that like to disturb plants on the ground, but it is a wonderful space-conserving technique, and ideal if you want to have an herb or flower garden on a small apartment balcony.
Propagate succulents from leaves.
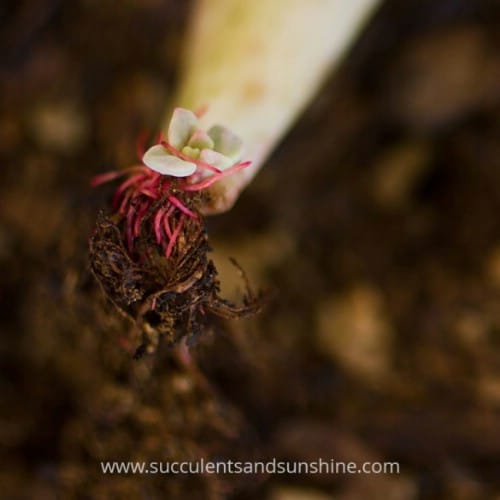
Succulents are among the plants which can sprout from their own leaves. So if you have succulents in your home, you can actually grow new ones using leaf clippings from the ones you already own.
Succulents & Sunshine will teach you step-by-step instructions. What a great way to grow your desert garden.
Find out what you can grow in the shade.

Frustrated by the lack of light in your garden? Does everything you plant wither and die, or simply refuse to grow in the first place? Get around that problem and make the most of the shady space you do have with these 15 shade tolerant vegetables. All of them require four hours of sunlight a day, or even less!
Build a water fountain out of plant pots.
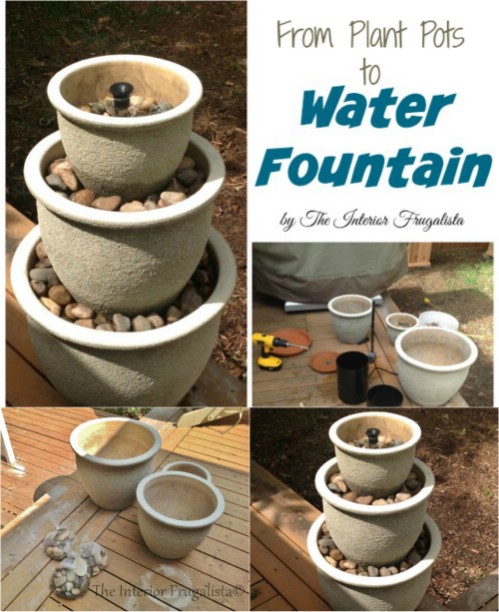
Wouldn’t it be great if you could have a little water fountain in your garden to create ambient noise? Have some old planters you don’t want anymore? If you have them in several different sizes, and don’t want to throw them away, you can convert them into a pretty little fountain using this tutorial. The supplies you need are pretty minimal, and the result is quite nice and easy to maintain. And it’s certainly less expensive than going out and buying a fountain. This project would be easy to customize.
Create an ongoing supply of green onions.
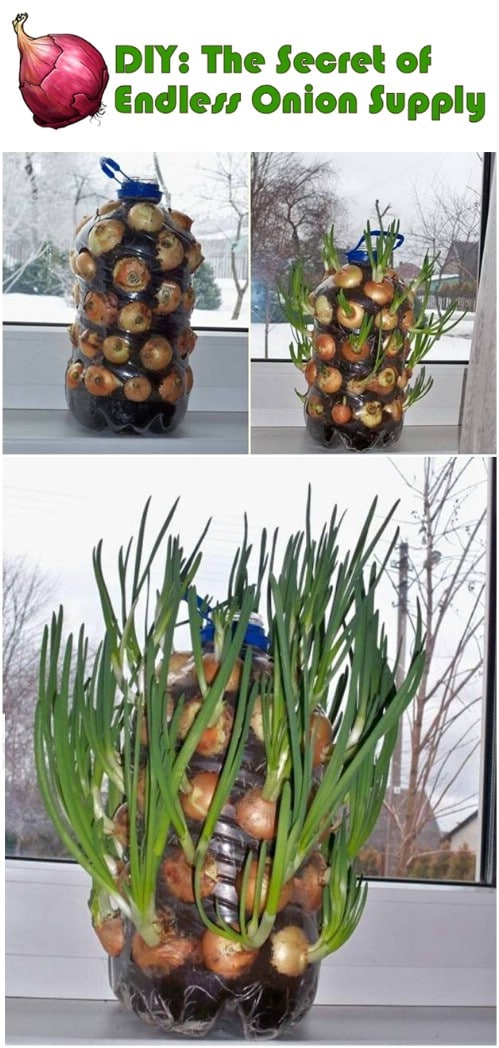
For this project you need a plastic bottle, which you cut the neck off of, and then add holes to the sides. Pop onion bulbs in through the holes when the bulbs are still small, fill the bottle with soil as you go, water it, and put it by your kitchen window. The bulbs will grow and start producing greens. You can cut the greens, and the bulbs will produce more. Note that this isn’t a method for creating endless onion
bulbs, just the greens.
Bury a freezer to preserve vegetables.
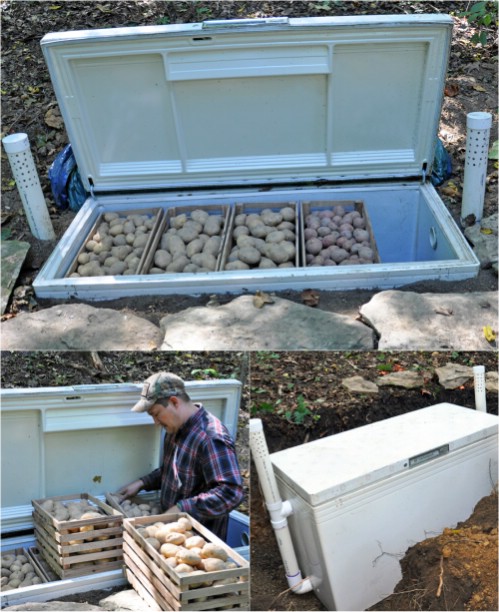
Joyful Home is an interesting blog if you want to learn how you can farm and raise thickens and seriously cut back on your grocery store! If you don’t have a root cellar or basement, this is a great alternative for preserving your vegetables. Mendy
describeshow she and her husband buried an old freezer to preserve their potatoes over the winter. By spring, only minor sprouting had occurred, and the potatoes were otherwise just the way they had left them. What a cool project!
Grow food from kitchen scraps.
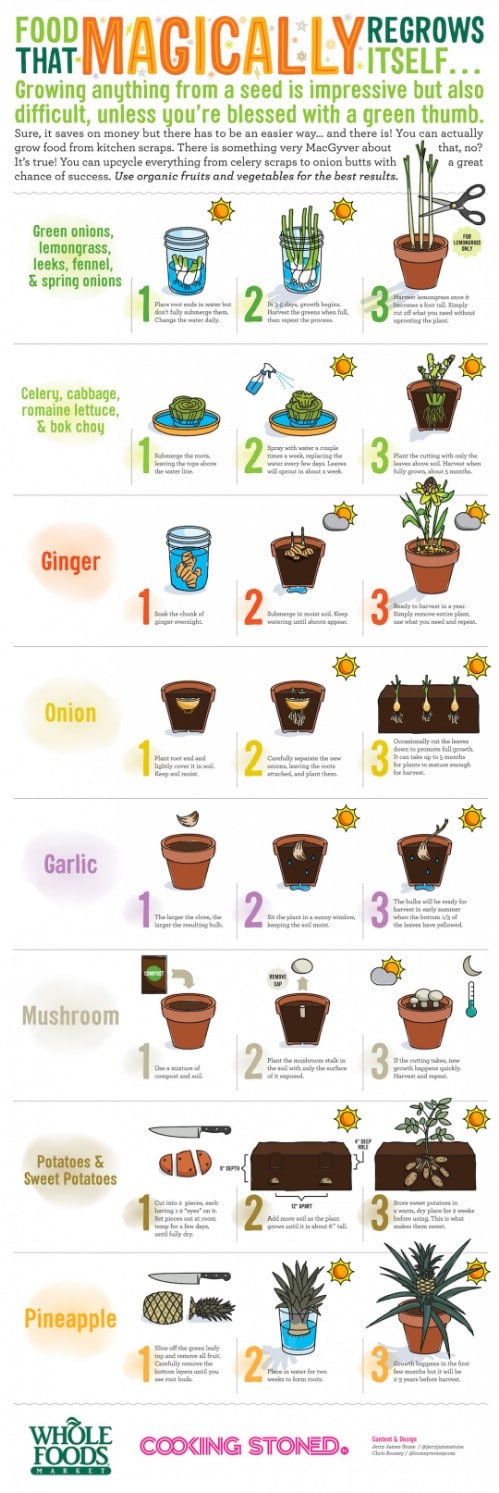
You know those vegetable scraps that you throw away while you’re cooking? Don’t! A surprisingly large number of them can actually be re-grown into food. You either place them in water and then move them to a pot, or place them a pot to begin with. This infographic teaches you how to re-grow a variety of vegetables from kitchen scraps, including onions, lemongrass, fennel, leeks, celery, cabbage, ginger, onion, garlic, mushroom, potatoes, pineapple, and more. It does take a bit of work, but what a great way to cut down on your supermarket bill.
Build a house for bats.
Bats are absolutely fascinating creatures, and in some places they are a threatened species. You can help them out by creating a bat house. This simple carpentry project uses only basic tools and takes just a few steps to complete. Up to 300 bats can roost inside the house (depending on the species of course). Note that this is also a good idea if you want to discourage bats from roosting in your own house or shed. Give them a better alternative, and most of them will go for it.
Turn a bath organizer into a planter.
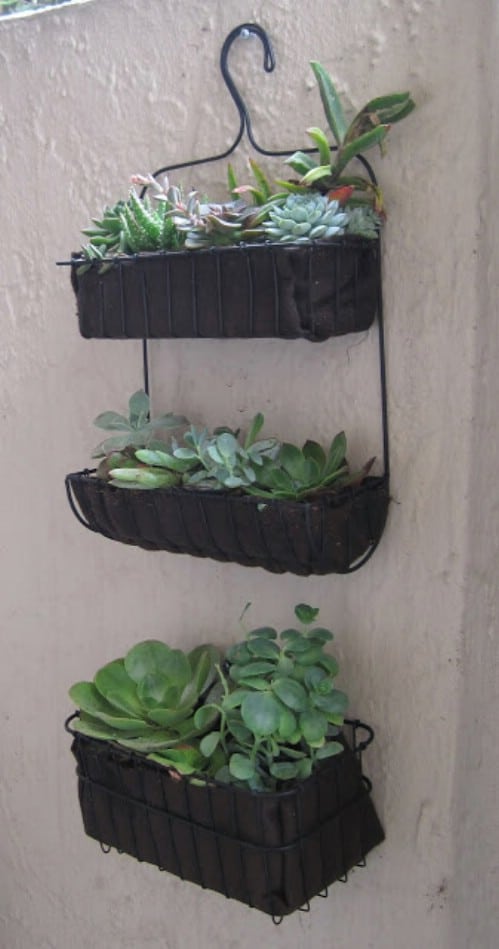
If you liked the repurposed pocket shoe organizer from before, you will love this idea. You know those bath organizers that you can put towels and soaps in? Try hanging one outdoors on your patio wall, and use it as a planter instead.
Bring plants back to life.
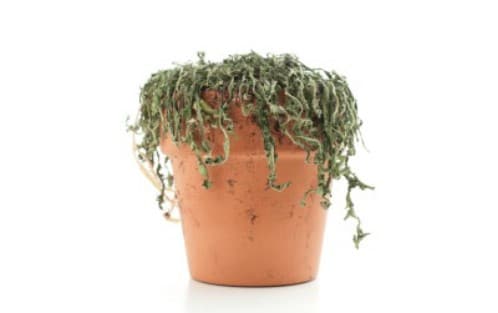
Okay, so you can’t
really bring plants back to life once they’re dead, but you can resurrect near-dead plants. Lots of plants which look brown and limp are actually still alive.
LifeHacker recommends that you trim the dead stems and leaves away and reduce the plant’s sunlight by about half and water it lightly. If you scroll down and check the comments, you will find other good advice for revitalizing dying plants as well.
Put a diaper in your potted plants.
… What? A diaper? Yep, you read that correctly. Try putting a diaper in the bottom of each of your potted plants. Why would you do such a thing? Diapers retain moisture—it is what they are designed to do! They will do the same job in your planter. They prevent potted plants from dripping. This is especially helpful for your hanging plants. You might need to water them a little more than usual though, since the diapers are soaking up moisture.
Build a bucket similar to Earthbox®.
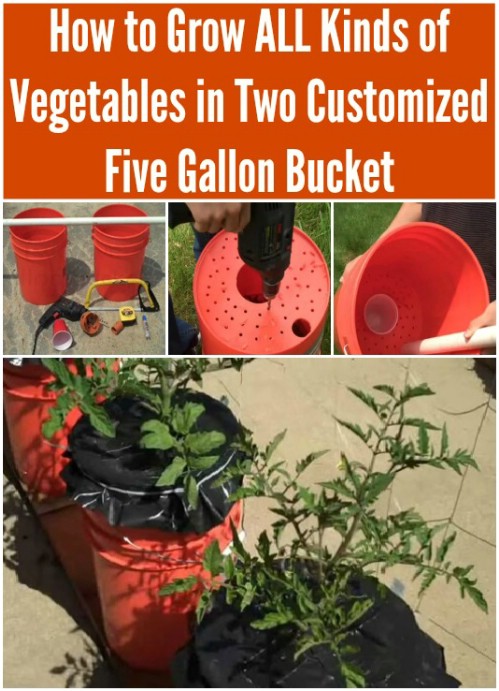
If you are familiar with Earthbox®, you know it’s a great system you can use to grow pretty much anything. It’s a great solution if you have a small yard or one with paltry soil conditions. They are expensive, though, and if you are on a budget, it may be better for you to build the equivalent on your own at home! Global Bucket is a low-cost project, fun to make, and very effective for growing a huge range of fruits and vegetables. Click
here to watch the how-to video!
Grow a living structure.

This isn’t a how-to, but it is a great list of ideas with some amazing pictures! A lot of them are pretty standard living structures—beautiful arbors and the like, but a couple of them are really unique, like a living chair or a succulent statue. My favorite one is the grass sofa. Since that would essentially involve nothing more than shaping the dirt and planting the grass, it would be easy to create, produce no strain on the plant, and be effortless to maintain. It’s probably pretty comfortable too!
Easy homemade wasp trap.
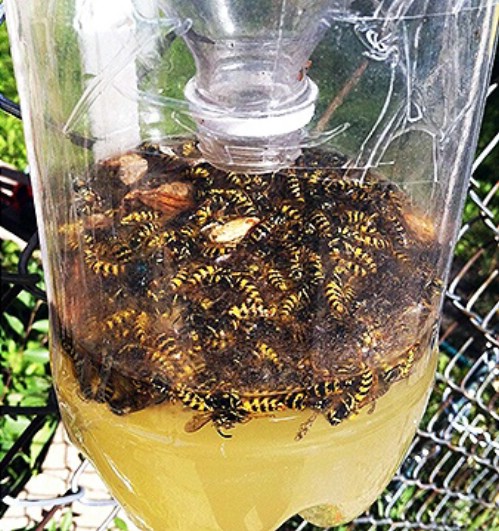
Need to get rid of some pesky wasp buzzing around your home or garden? It’s a good idea to take care of this problem quickly before it turns into a bigger one! This easy home made wasp trap uses a plastic bottle and some sugar water. Judging by the photograph, it’s plenty effective too and will do its job quickly and thoroughly.
Make a watering can out of an old milk jug.
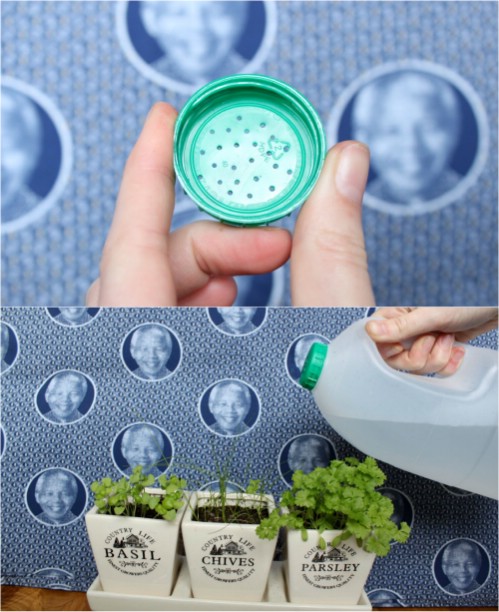
Looking for an easy way to water your plants, but don’t want to buy a watering can? If you happen to have an old plastic milk jug, all you need to do is heat up a needle and use it to poke a lot of small holes in the lid. Voila, you have a working water can. This is a great way to recycle.
Grow wisteria in a pot.
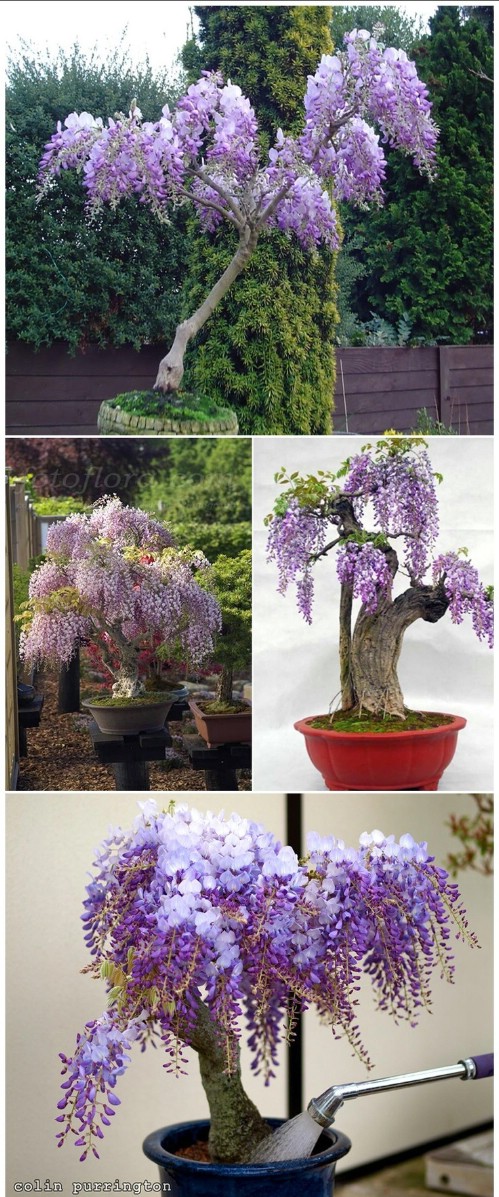
Wisteria is a gorgeous climbing vine that adds beautiful color to a trellis or a wall. Did you know that you can also grow it in a pot? Learn how in
ten steps. I actually think these look like little bonsai trees. It looks like a challenging but fun project with beautifully rewarding results.
DIY Instructions and Project Credit: ehow.
Sharpen your old gardening tools.

Don’t want to throw away your old, dull gardening tools that you’ve had for decades? Well, why should you? With a little sharpening up, they’ll be as good as new, and you’ll be ready to make good use of them again.
This post will teach you how.
Turn hydrangeas blue or pink.
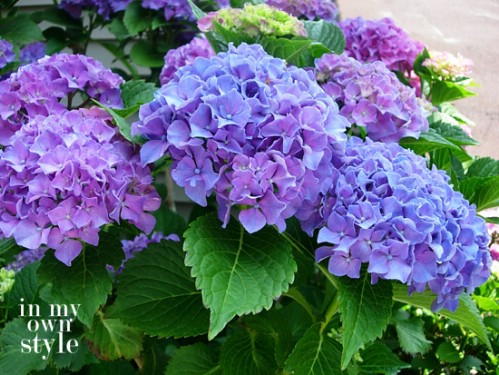
When hydrangeas come in nicely, they are a bold, beautiful color, usually bluish-purplish with a touch of pink. When they don’t come in well though, they are usually a pale, watered down blue with a yellowish tinge—not nearly as impressive. If you want to get your hydrangeas back in all their colorful glory, it turns out it’s just a matter of fixing the pH of your soil. In fact, if you add garden lime, you will turn them pink. If you add soil acidifier, you will turn them blue. There are even products you can purchase to do just that, which makes it super easy! Add the right kind of fertilizer, and you will get the effect you are aiming for.
Build a clay pot lighthouse.
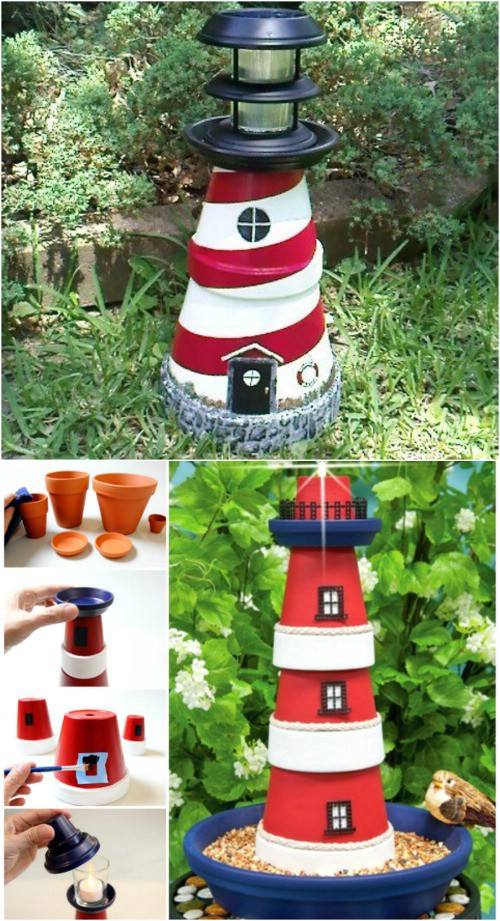
If you love all things nautical, I think you will agree that this is just about the most adorable thing you could do with old clay pots! When I first glanced at it, for a moment I didn’t even realize that what I was looking at was just a few pots stacked one on top of the other—it is very convincing! What an adorable way to light your porch or garden at night and share our love of lighthouses with family and friends.
Make a butterfly feeder in 6 easy steps.
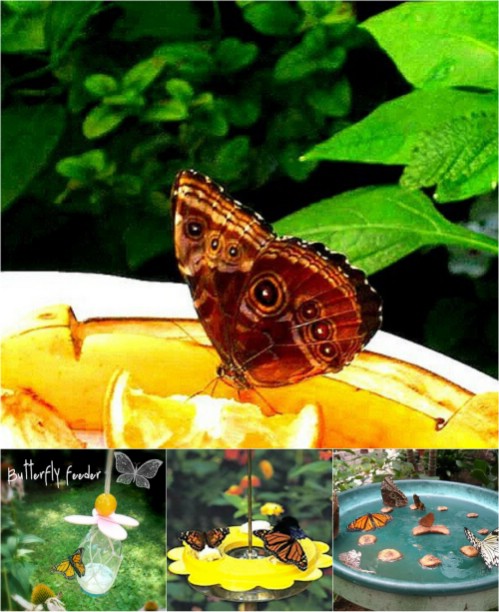
One of the joys of maintaining a garden is the colorful flowers that come into bloom throughout the year—but the flowers are not the only splash of color to be seen in a garden! Butterflies can also make a dazzling display—but only if you are able to attract them. One way you can do that is by making a butterfly feeder from scratch. The only materials required are common ones, and the whole project only takes 6 simple steps. Check it out
here.
DIY Instructions and Project Credit: Hometalk
Learn your succulents.
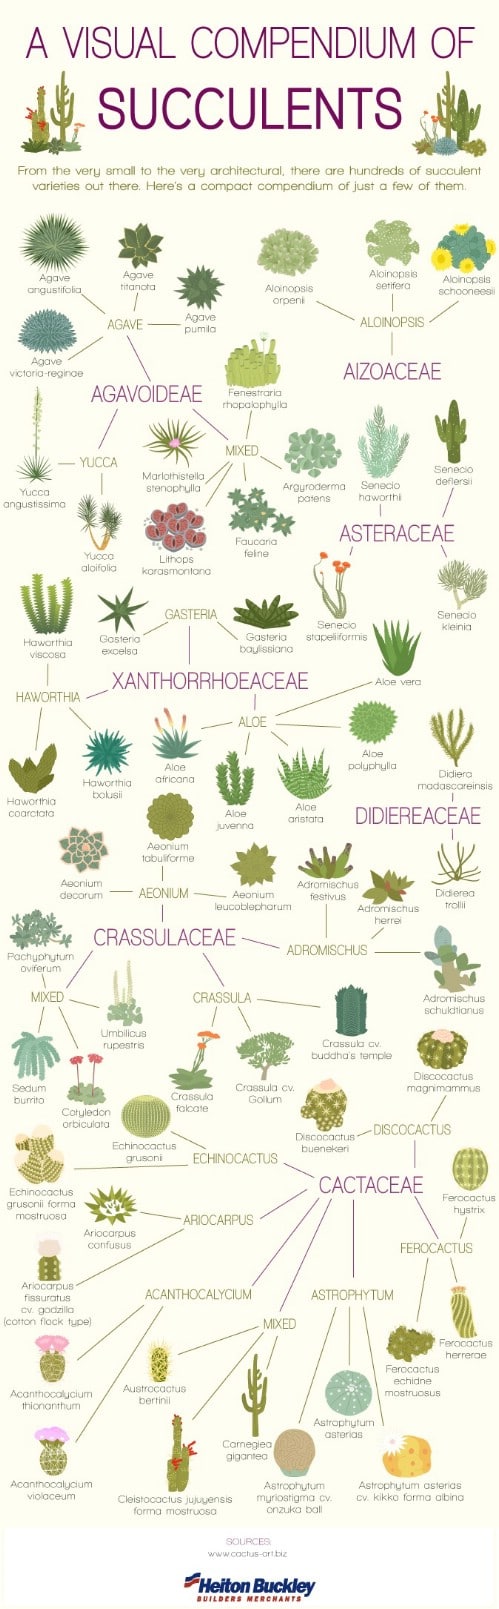
Succulent plants are amazing. They can thrive in extremely dry, hot conditions, which makes them relatively easy to care for, and the perfect choice if you live in a desert climate. Check out this chart to learn about lots of different types of succulents which can go great in your own garden.
Turn a wine bottle holder into a wall planter.
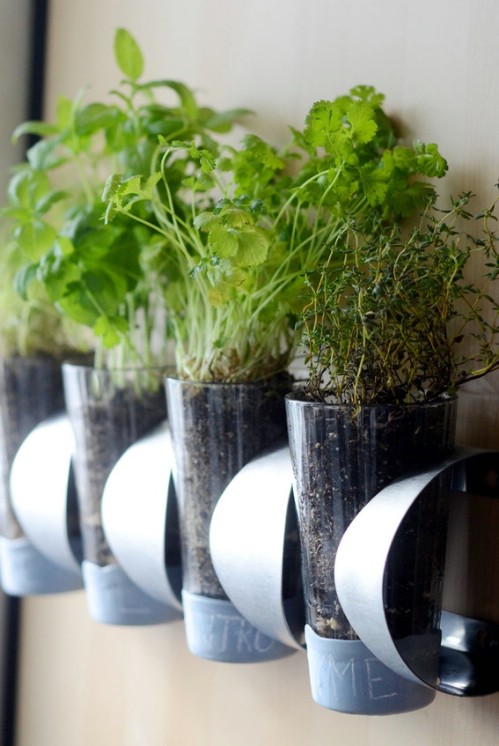
This project uses the IKEA Vurm, which is a wine bottle holder. Pint glasses turn out to fit perfectly in the rack, and work great for growing herbs indoors. You could also hang this outdoors on a patio. What a fun and easy project!
DIY Instructions and Project Credit: Curbly
Stencil a pattern on an apple.
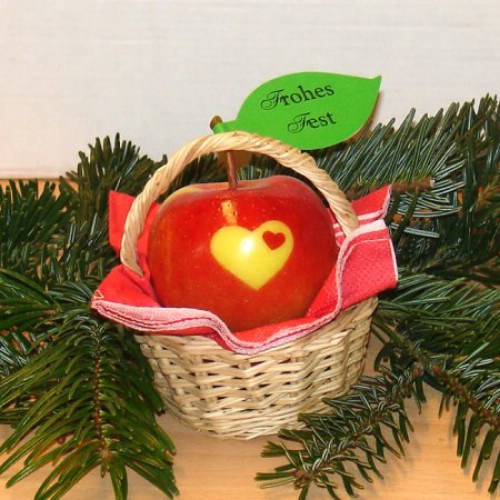
Here’s a cool tidbit. If you have red apples growing on the tree which are still green, you can use a sticker to cover up part of the apple, and that part will remain green after the rest turns red. You can then peel the sticker off and you will have a design on the apple. This is a very cute and clever idea which is perfect for growing apples to give as gifts or to sell or use for any creative purpose.
Repurpose gutters for strawberries.

If you want a great way to grow strawberries, try hanging old guttering from welded re-bars. The strawberries grow very nicely from the guttering, and are easy to pick from overhead. There is unfortunately no how-to on this one, but it should not be too challenging to figure it out. Punching some holes underneath would help with drainage.
Make a unique, round garden trellis.
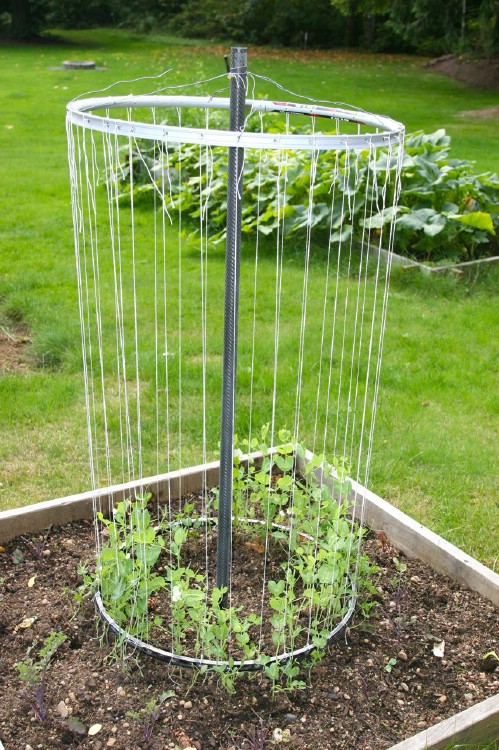
If you are looking for a fun DIY project that you can build in an afternoon, you will love this idea for making a garden trellis with a unique round shape. The cylinder is just a couple of bike rims, an upright, plus a little garden twine and wire. It is a fast, easy, and fun project with fast results. I would love to see what it looks like once the plants have grown clear up to the top. I bet it has a gorgeous effect!
Make a cute topsy-turvy stack of gardening pots.
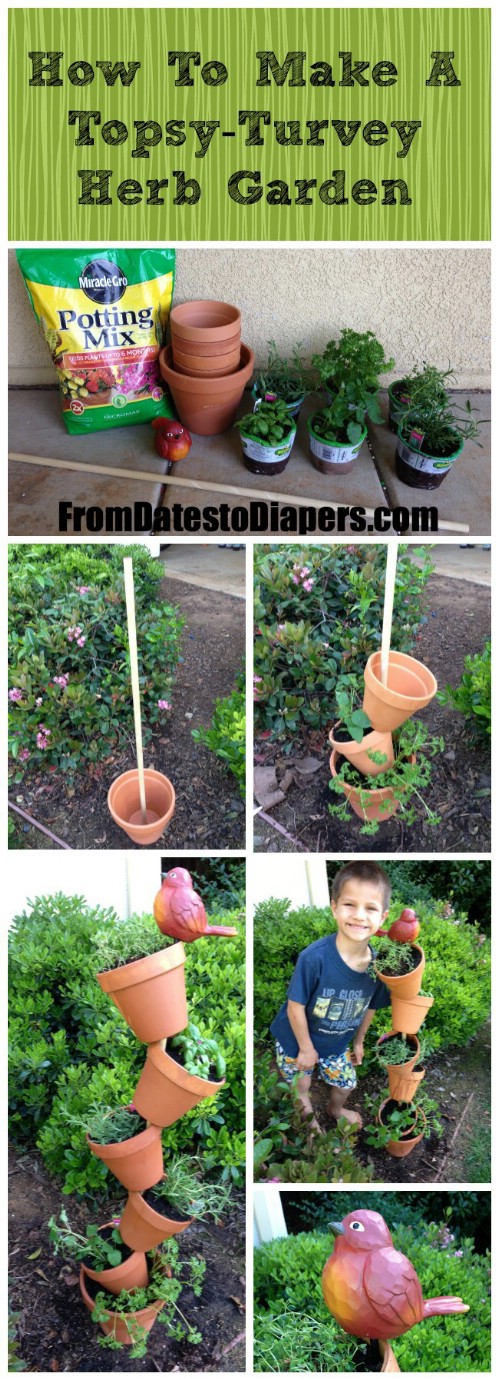
Check out this super cool stack of planters which seems to defy gravity! At first, looking at this, I was pretty baffled, until I noticed the pole going through the middle. This tutorial will tell you step-by-step what you need and how you can assemble all your supplies to recreate this cool and whimsical effect in your own garden. I imagine that if you grew some draping plants from the pots, you would be able to conceal the pole completely, and the finished look would be even more convincing.
Make a beautiful tiered herb garden.
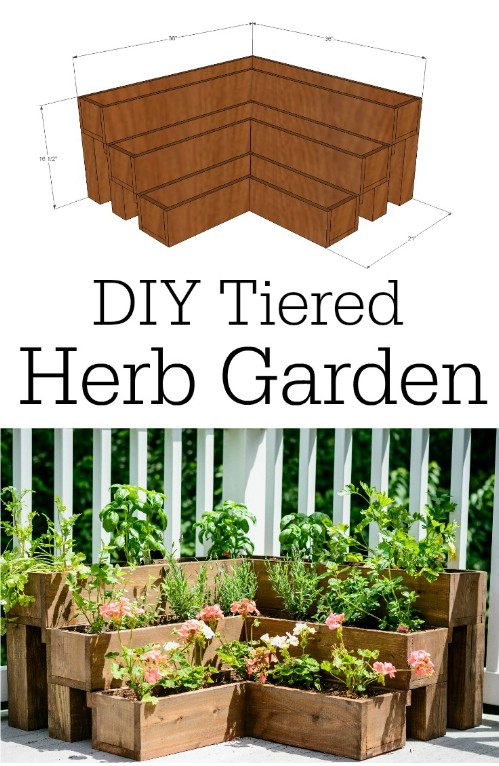
Need a way to save space on a small deck or patio? This tiered herb garden will help you make use of vertical space and free up some room. Frankly, though, even if you had plenty of room to spare on your patio, I think this tiered herb garden would be a terrific project. Just look how gorgeous it is!
Use glass bottles to edge your garden path.
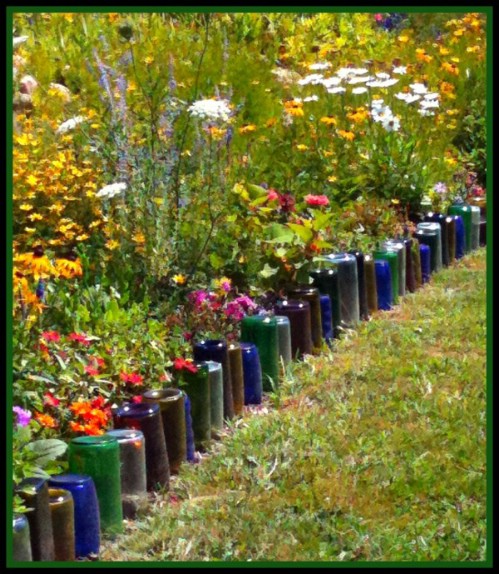
Here is a very simple idea that is actually very pretty. Have a bunch of glass bottles lying around, waiting to be recycled? Instead of sending them off to the recycling plant, why not instead use them to edge your garden path? As you can see in the photo, you just push them into the soil upside-down. They probably look even prettier when they catch the light.
Learn the best tips for growing summer squash.

Summer squash is very tasty and filling and works great in a lot of recipes. How can you grow the best summer squash with the most success? This blog will teach you the best practices from planting to harvesting so you can enjoy delicious results.
Get 48 gardening tips which will help you save money.

Empress of Dirt is an excellent gardening resource, and
this post will provide you with a wealth of amazing ideas for saving money! You will learn how to keep your soil healthy, how to collect rain water and make the best use of it, how to make your own compost, and more. Tips for mulching, planting, and propagation are next. You’ll then learn how you can extend your growing season, repurpose broken junk around your garden for useful and beautiful purposes, and imitate nature for efficiency. You will find so much great information in here. This is a wonderful starting resource for anyone who wants to cut their costs while honing their green thumb!
Grow your own herbal tea garden.
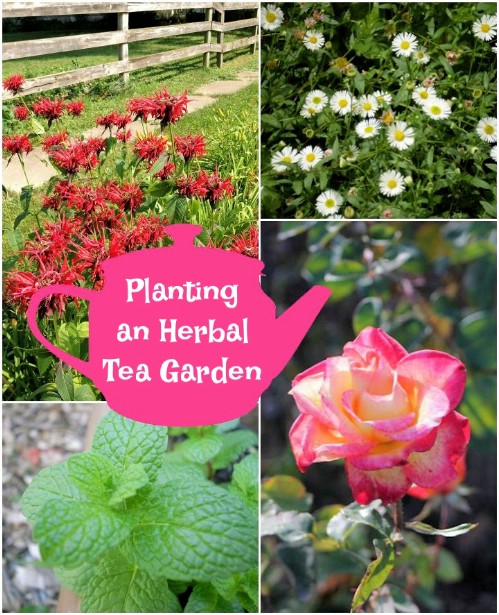
Lots of people grow herbs to add to their food in their gardens, but have you ever thought of growing herbal tea? This
blog will get you started out right designing your garden and picking herbs. You will also learn tips for harvesting them when they are ready to use as tea. You will learn how to dry them (if that is what you want to do) and store them.
DIY Instructions and Project Credit: Blommi
Create a worm composting bin.
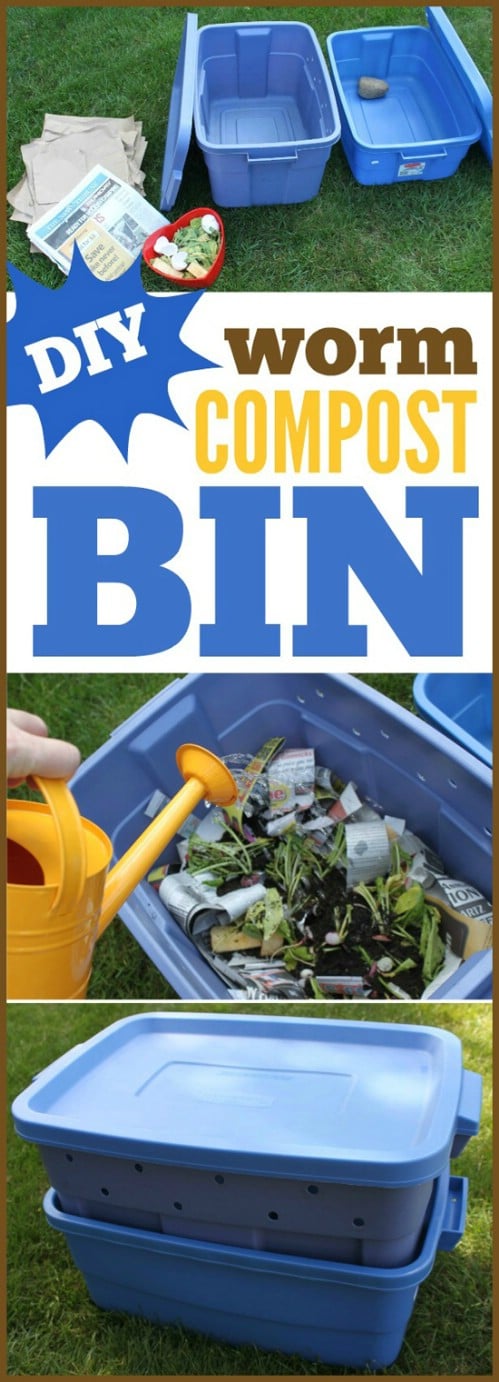
If you have a plastic storage container and want to learn how to compost at home, this excellent detailed
tutorial will teach you all about it. You need about a pound of red worms per two 8-10 gallon plastic totes (you need two totes to make one compost bin). You can mail order the red worms. Why red worms? Earthworms often do not thrive in compost bins, but red worms do.
The blog will teach you the detailed procedure for drilling holes in the compost bin, filling it with the right ingredients, and setting it up in the right spot. You’ll learn what you need to do in order to maintain it and how long to wait before the compost is ready. You’ll also learn what to feed and not feed your compost worms. Very high-quality blog, and an excellent tutorial that could get anyone started on composting!


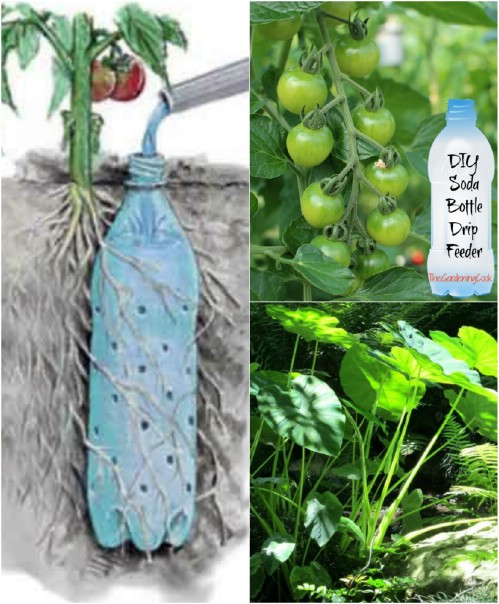 Have plants (especially vegetables) that do better if the moisture is delivered to their roots instead of from overhead? One cheap and simple way to make a drip feeder which you can place underground next to your plant is by using an old plastic soda bottle. Just puncture some holes in it (a barbecue skewer works great), and then plant it next to the young plant. The bottle will enable a slow release of water near the roots. This method prevents fungus and also reduces problems with leaves. Check out the source for detailed, in-depth instructions. Later on, we’ll share some more ideas which are similar to this one and which are great for other applications.
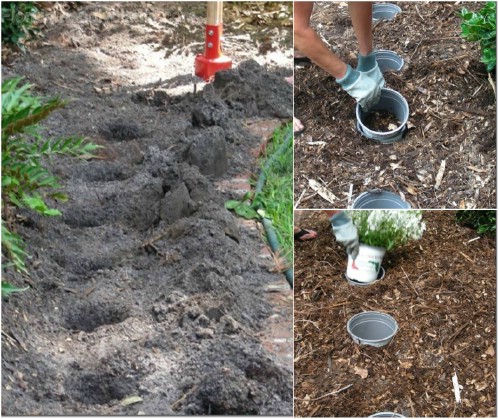 The pot-in-a-pot method is one which you can use to solve a whole lot of gardening problems.
 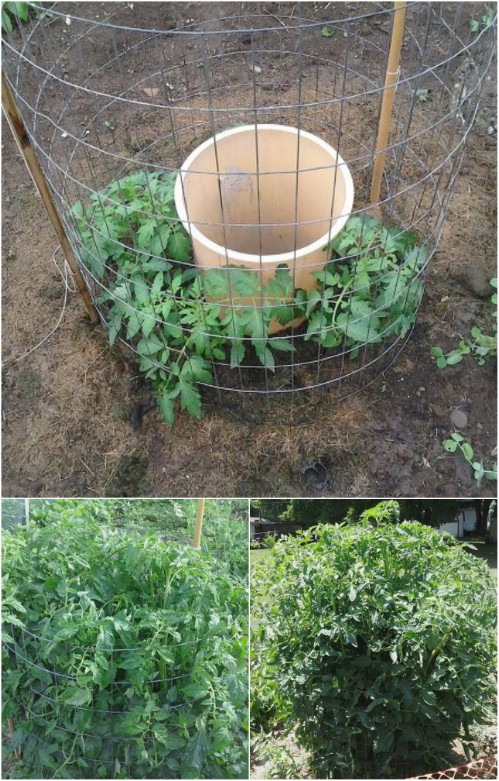 Tomatoes can be tough to grow in dry climates, and watering them with an overhead sprinkler isn’t always best for their leaves. The solution? Believe it or not, all you really need is a garbage can with a few holes drilled in it and a couple shovels full of compost. Check out pictures and the method
 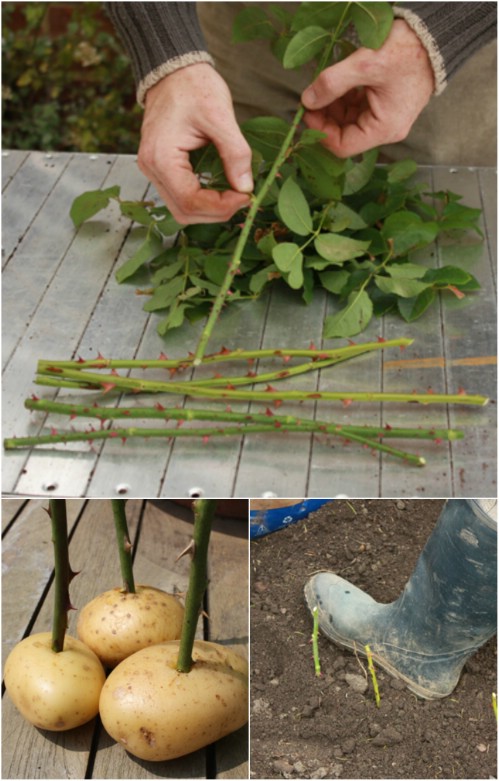 One of the easiest ways to grow roses is by taking cuttings. This page will teach you the basics, and also a cool and very odd trick involving roses in potatoes. That’s right, you can grow roses … in potatoes. You stick the rose cutting into a potato and then push both into the ground. The potato keeps your cuttings moist while roots are developing.
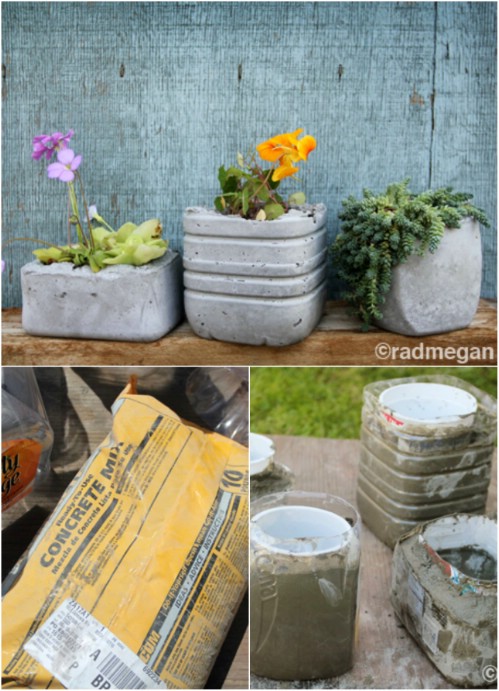 Remember the concrete block raised garden from earlier? Here is another similar idea, only this time, you are starting from scratch! That’s right, no concrete blocks, just concrete. This is an immensely cool and creative project where you create the concrete planters from scratch using plastic containers as molds. The finished results look just awesome! I actually love the fact that they’re a little rough around the edges. They look almost like something you’d find at an archeological dig a thousand years in the future.
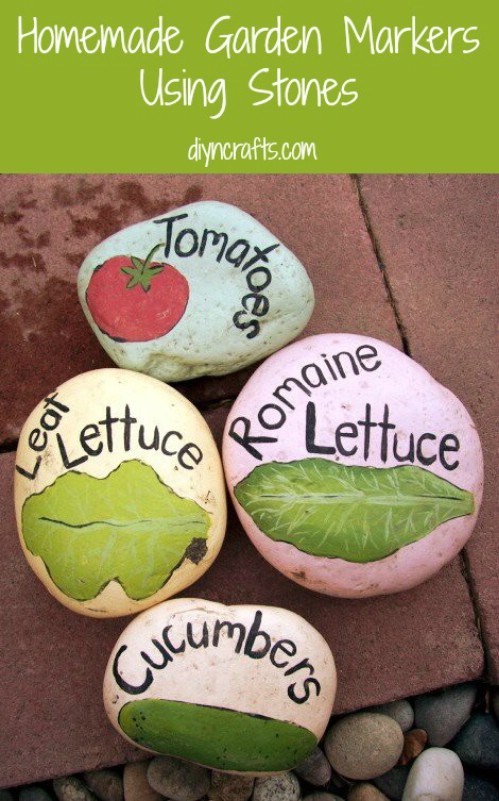 At the garden shop, you have probably seen cute painted river rocks with sayings on them. What’s even better? Garden stones you paint yourself. You just need some flattened river rocks and some paint and markers. What’s great about this idea is that you can write anything on them, including the names of things you have planted. This is great if you still are not used to identifying plants at a glance—or if they have not sprouted yet and you are not sure what is where.
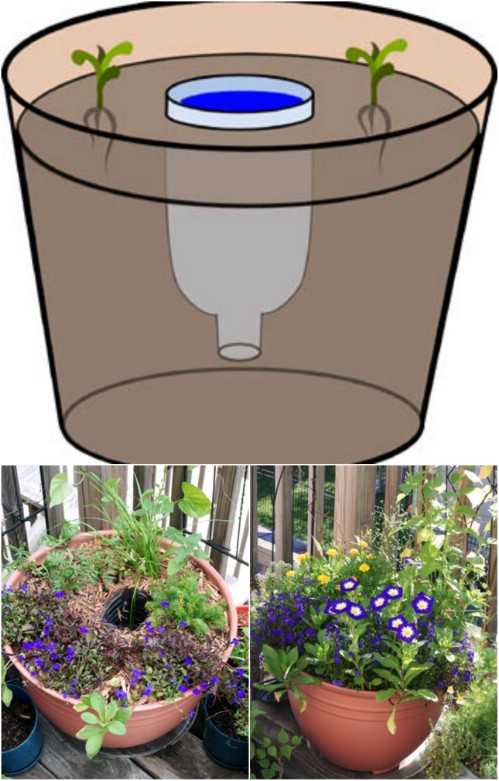 This is similar to the slow-drip bottle from before. You get a plastic bottle, cut the bottom off of it, and make sure it is around the same height as the planter you are using. Push it into the soil before you plant a new sprout, and fill the bottle with water on hot days. It will drip slowly into the water and go straight to the roots. This can be very helpful to growing plants. Be sure to check out the source article for more tips and tricks for making the most of your water bottle reservoir.
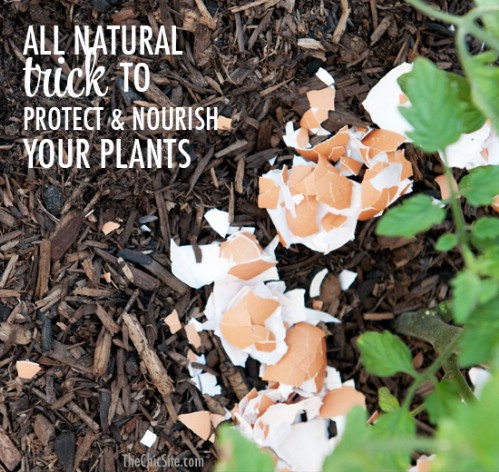 Next time you make a batch of deviled eggs, don’t toss the shells in the trash! Eggshells are useful in the garden. If you spread them around the bases of your plants, you can nourish the soil with calcium. On top of that, eggshells actually repel certain insects, so they protect your plants from pests. Very cool.
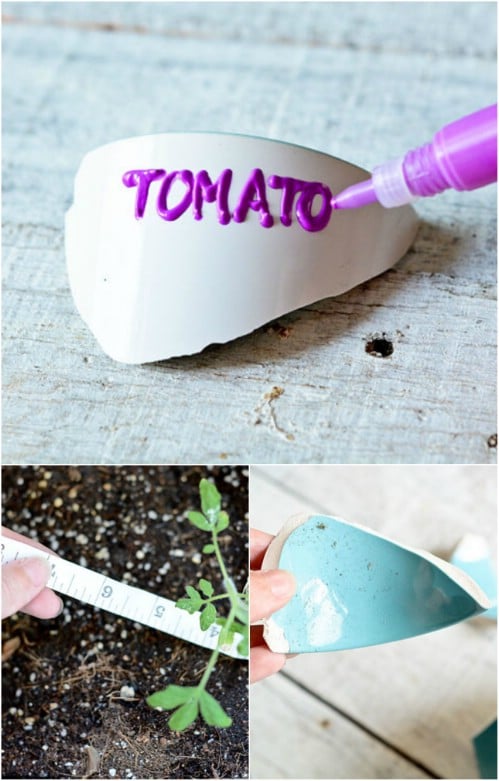 Like the river rocks from before, this is another idea for marking the locations of your plants. It’s a cute idea for making good use of materials which would otherwise go to waste. Plus, it is sad when a faithful pot breaks, and this way you get to keep it as part of your garden. The only caution I would add to this one is that the broken edges are sharp, and this is probably not something you want in your garden if you have kids running around.
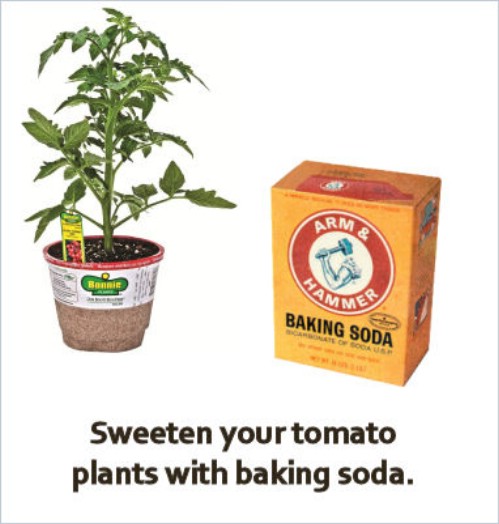 A lot of people love to grow tomatoes because they are usually much juicier and sweeter than the ones you buy at the supermarket. How can you make even sweeter and more delicious? Try adding some baking soda to the soil. Make sure you only sprinkle it on the soil, not the plant. The baking soda is a base and counteracts the acidity in the tomatoes. The result? Sweeter tomatoes.
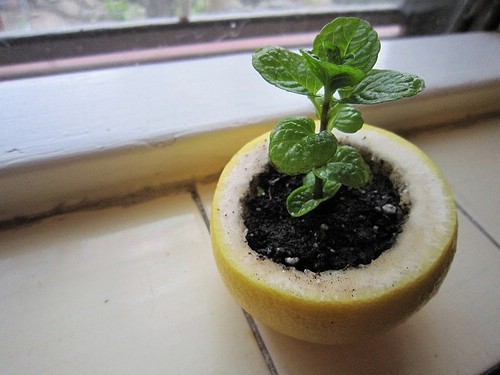 This method for planting was discovered by the author of My Roman Apartment. The blog owner had vowed to buy nothing new for one calendar year but then ended up stumped over where to plant a new seedling. As it turns out, you can successfully grow a seedling in a hollowed-out citrus rind with some potting soil in it. It is a good idea though to throw away the peel on your compost heap when you are ready to plant the seedling in the ground, rather than plant the citrus peel too. Why? You do not want too much acidity leeching into the soil.
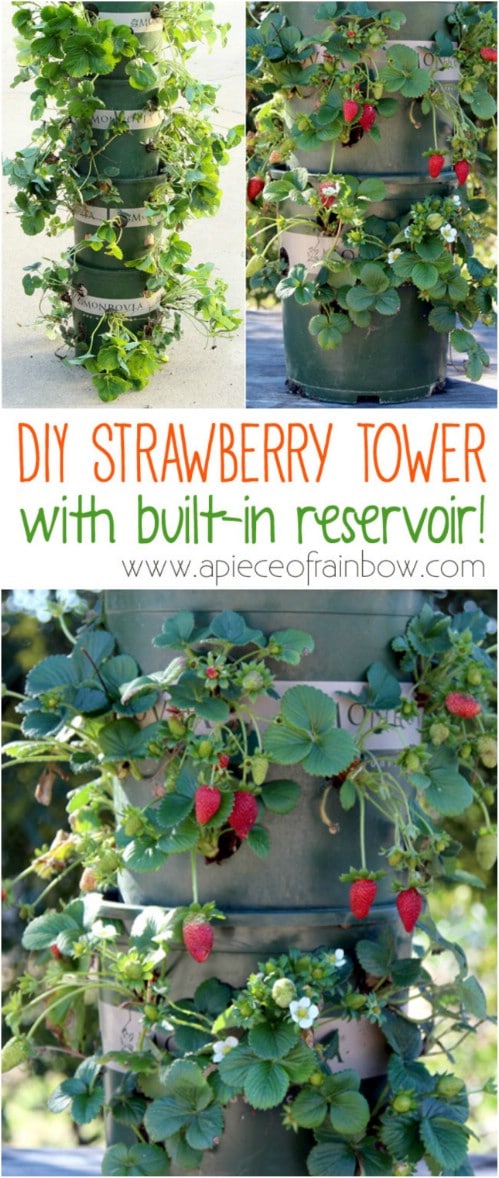 If you want to grow a lot of delicious juicy strawberries and conserve space in the process, the strawberry tower is a great way to do it. What’s really exciting about this setup though is the fact that it allows you to drip water gradually through the whole tower. There’s a water bottle in the top pot (just like the one you read about before). The water drips down into the top pot to all the ones below.
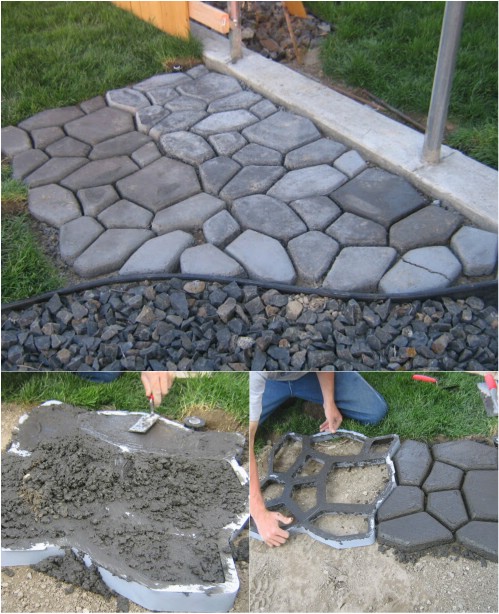 Cobblestones have a really charming effect anywhere you put them. They are great for building a patio or for creating a path through your garden. No matter what your plans are, this simple tutorial will show how you can do it from scratch. The photos are clear and easy to follow. In fact, this whole project is a lot simpler than I ever would have guessed. Who would have thought adding some old-fashioned charm to your yard could be so easy?
 On this page, you will find a bunch of exciting projects for making adorable garden critters, all out of recycled materials! I just love that hedgehog. Amazing that he is made of nothing more than a plastic bottle with some twine and a couple cute little eyes—and he doubles as a planter, with the plants standing in for his fur! It’s hard to believe that rooster started out as a plastic bottle, or that those butterflies started out as the same—just another type of bottle. There is no way I could say which of these projects is the cutest! They are all just incredible!
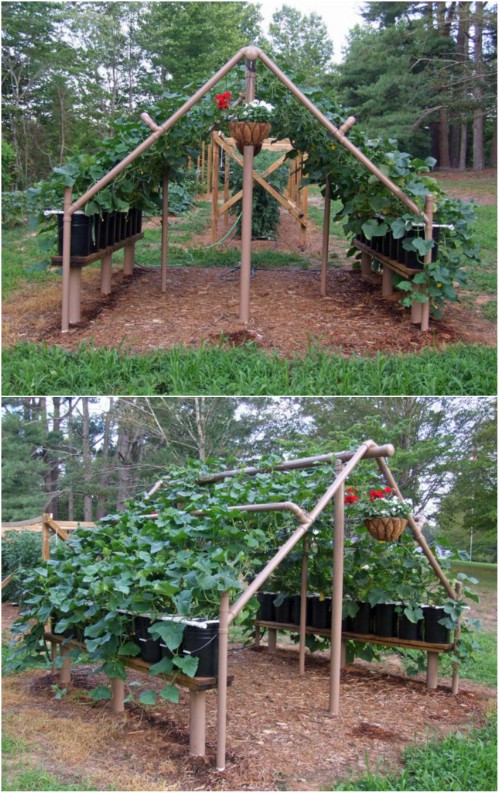 Have you ever wanted to add a trellis to your yard? One surprisingly easy design uses PVC pipes linked together. Just check out these beautiful photos. This trellis is being used to grow cucumbers, but you could grow any number of things on it. It looks and works great.
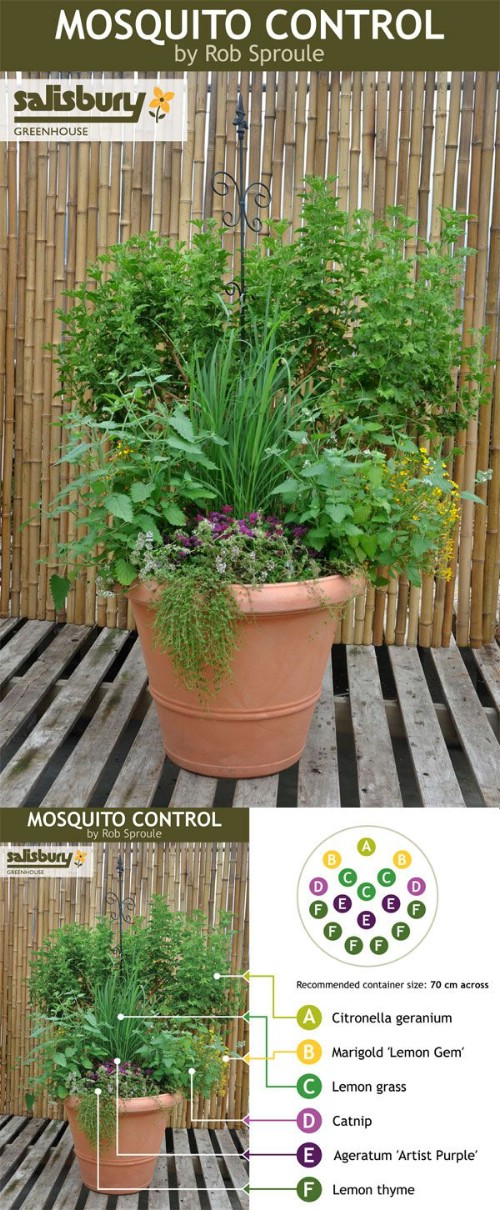 Are mosquitoes bugging you in your garden or on your deck? There are a number of herbs which naturally repel them, including catnip, lemon grass, and more. Plant one or more of these together in your garden, and you will get those bugs away fast. Put them in a pot and grow them on your patio or deck and you can keep them away from the areas where you like to spend time. As a bonus, these herbs are all useful for other purposes, so you can harvest them for food and more. This is a much healthier alternative to spraying mosquito repellent everywhere. It’s better for your garden and for you.
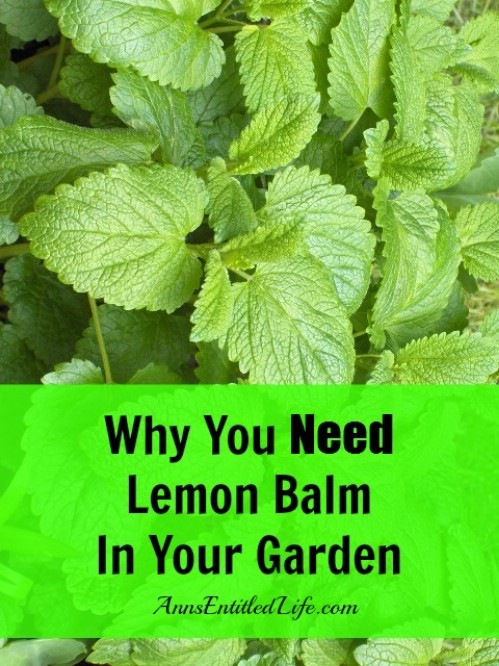 Trying to think of a new herb to grow in your garden? Think about growing lemon balm! Lemon balm, according to Ann’s Entitled Life, is one of the most all-around helpful herbs you can grow! It acts as a mosquito repellent and also helps to draw bees to pollinate your flowers. On top of that, it has a bunch of great medicinal uses and goes great in a variety of recipes. It also is wonderful for potpourri and aromatherapy. And believe it or not, it makes an excellent conditioner or facial. Basically, it is useful in every area of your life and every area of your home.
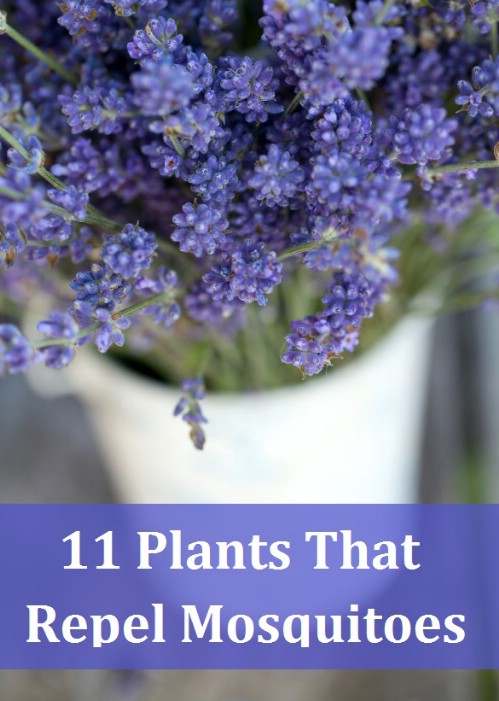 Earlier I talked about how you can repel mosquitoes using herbs. If you want to learn even more helpful plants that will chase away those pesky insects, take a look
 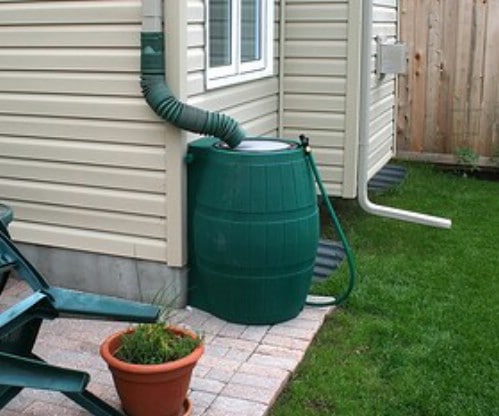 Live in a location where you have a high water bill? One way to cut down on the costs of gardening is to take advantage of the water that falls from the sky. If you need to water your plants on dry days, why not set up a rain barrel to take advantage of natural precipitation? Collect the water when it falls, use it when it’s needed. This is an easy system to set up, and perfect for dropping your utility bill.
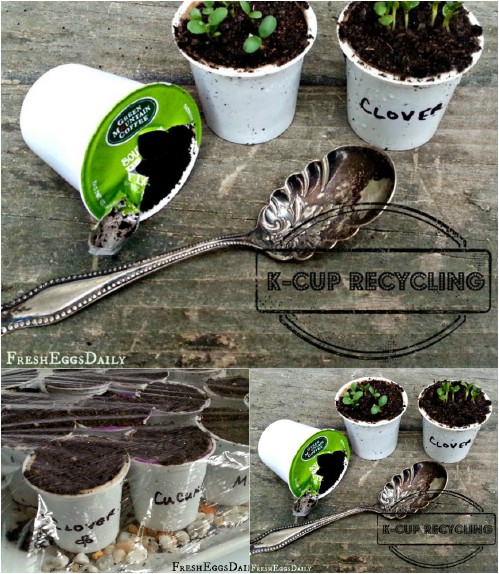 Do you have one of those coffee makers that requires you to use K-Cups? All those K-Cups add up to a lot of trash—unless you make good use of them in your garden. It turns out they are the perfect size for seed starters. Just label them and add your seeds and wait for them to sprout.
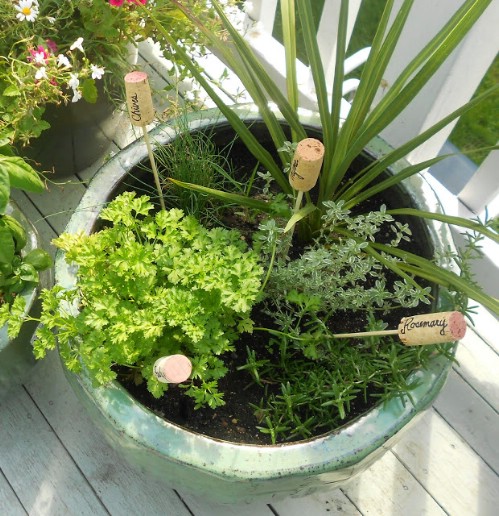 There are so many cool ideas for plant markers out there! While the river rocks and the broken pots are very cute and creative, here’s one for the avid wine drinkers out there … wine corks! Just retain the corks from the wine you drink and write on them with a marker, then peg them into the soil as in the picture. This is just so cute, and a great personalizing touch to a garden!
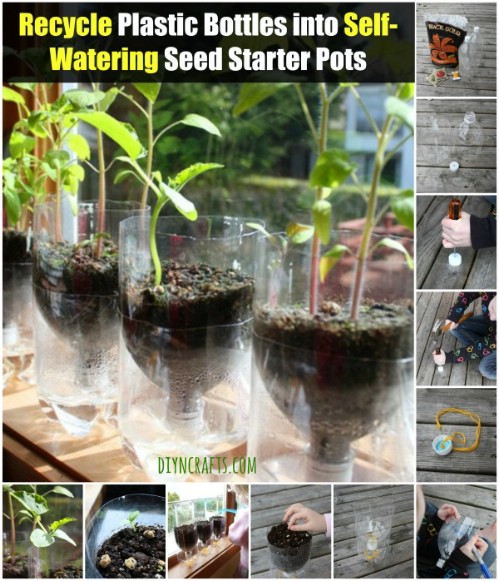 I have talked about how you can use old plastic soda bottles to water plants, but did you know you can also turn them into seed starters which water themselves? This is a cool project which teaches some science principles, so it is perfect to do with your kids. You cut the plastic bottles in half, and then put the top half upside down inside the bottom half. Moisture condenses in the bottom chamber. You direct a piece of yarn through a hole you punch in the bottle cap, which draws the moisture upwards. This is a fun way to start a gardening project indoors.
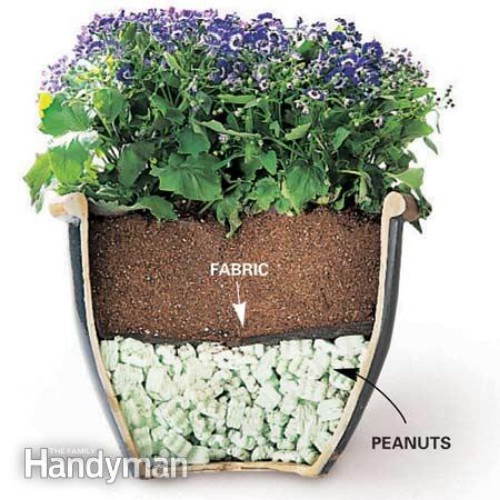 Have one of those super heavy huge outdoor plant pots which is backbreaking to try to relocate once it is full? One easy way to reduce the weight of these outdoor plants in the future is to fill the bottom part with foam peanuts, then put the dirt on top of that. This reduces the weight a great deal, and actually improves the drainage of your soil. How cool is that? Keep in mind you will probably need to water the plant more often.
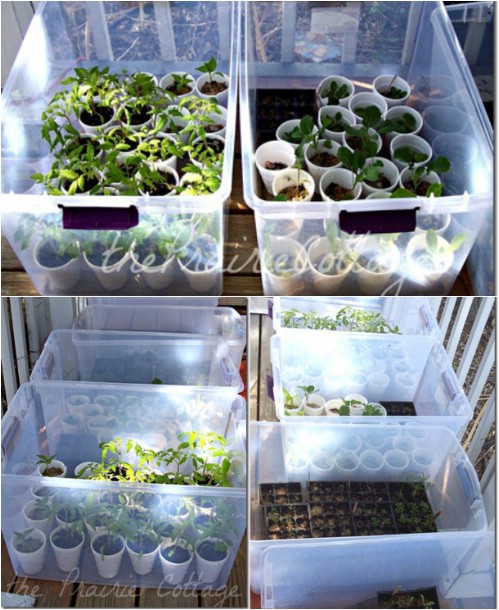 Clear plastic bins are awesome for just about everything. As it turns out, one of their many applications is in gardening. These bins can serve beautifully as mini-greenhouses for growing seedlings! Since they are cheap and versatile, and can have other applications off-season, this is one of the best gardening tips and tricks for beginners.
 If slugs are a major pest problem in your garden, you can learn a variety of different methods for killing them

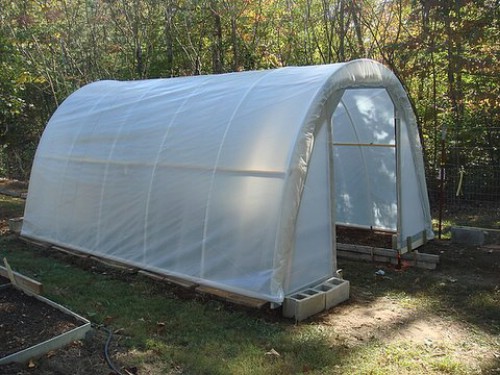 Want to put a greenhouse in your backyard, but worried you can’t afford it? Believe it or not, you can purchase all the materials you need to build a fully-functional greenhouse for just $50. That’s if you get the materials used; buy them new and your cost will be closer to $200, which still isn’t bad at all!
 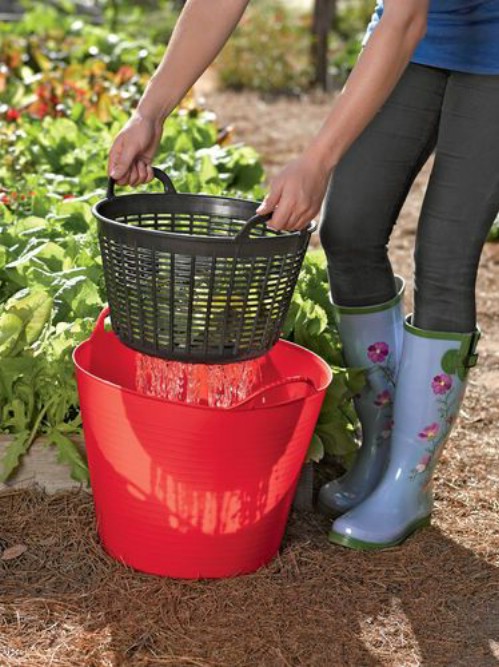 If you are looking for a way you can cut back on your water costs, here is one idea. Have some vegetables from your garden you need to rinse? Need to water your garden? Just put a bucket under your colander and rinse your vegetables right there. Instead of letting the water go down the sink drain, you will collect it in the bucket. Then just use it to water your plants. Sometimes the simplest ideas really are the most ingenious ones.
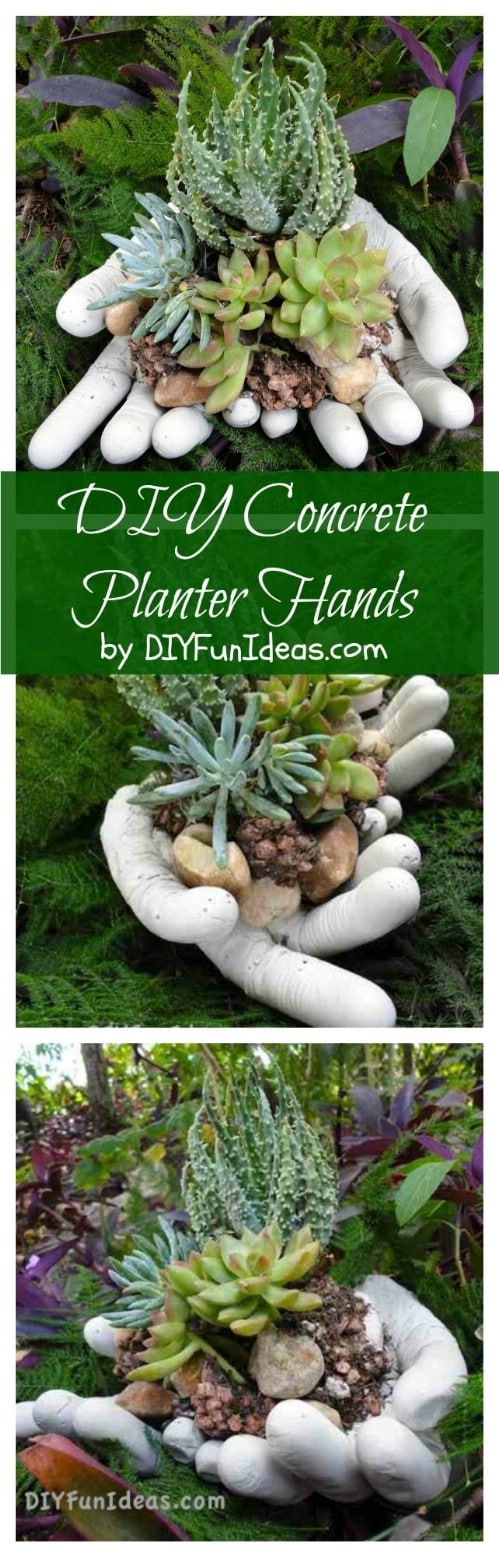 This is a fun and surprisingly easy project you can do using some really basic supplies. You just need cement for casting, water, a pair of plastic gloves, and a trowel. As you can see, the finished result is both fun and surreal. Scroll down to the bottom and you’ll also find a link to a fun high heel planter tutorial. This lady has a lot of really cool, creative ideas!
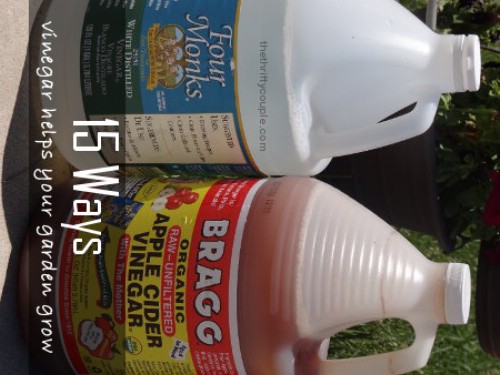 Apple cider vinegar is one of the most handy substances to have around the household. It has literally hundreds of uses, and it turns out that a fair few of them are out in the garden! Apple cider vinegar helps to keep fruit flies away, nourish plants that thrive in acidic conditions, kill mold, get rid of those annoying brown splotches in your grass, and so much more. Discover all the amazing uses
 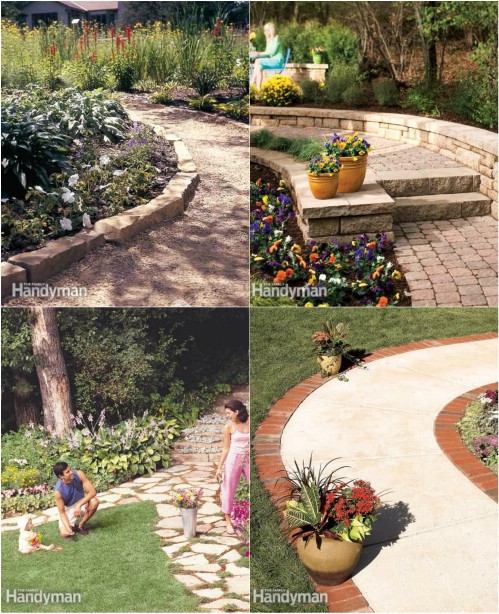 If you decide to put a pathway in your garden, you have a bit of an undertaking ahead of you. It can take a great deal of time and work to get a path laid out. But does it have to take a great deal of money? Not if you choose one of
 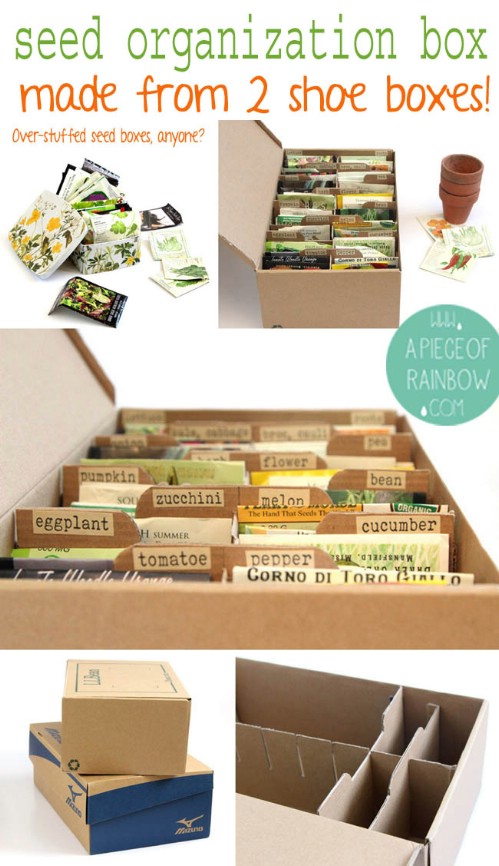 If you are looking for a nice place to store your seed packets which will help you to keep them organized and easy to access, you can try this project to create a seed box. You just need a large shoebox and some cardboard to start out. You will learn how to create handy dividers with tabs which you can label to help you find specific types of seeds. You can label these with the types of plants, and then you will always know immediately where to look to find what you need, even if you have dozens of seed packets! This project is as thrifty as it is useful!
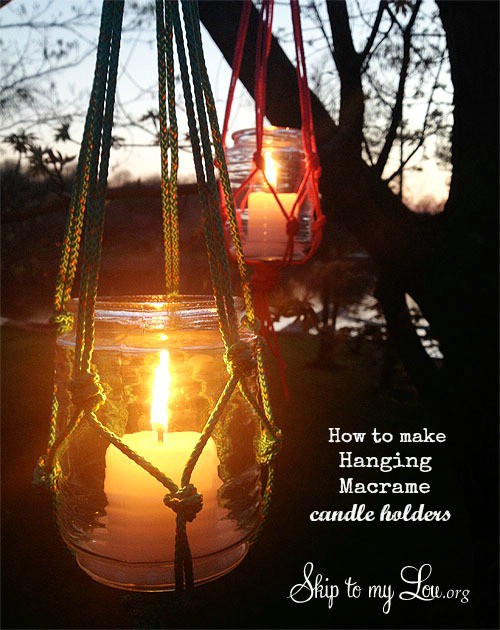 Looking to add a little ambiance to your patio or deck garden after dark? If you have an interest in macramé and want to try your hand at a really simple beginner’s project, these hanging macramé candle holders are for you! You can use them to light your deck or you could string them between trees in your garden. The step-by-step
 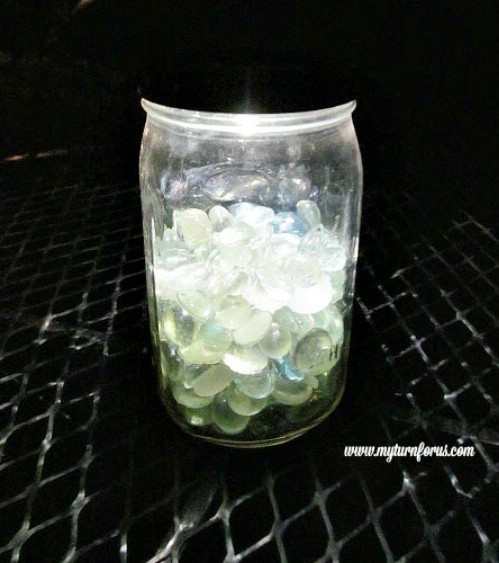 For this project, you will need to actually purchase solar lights, but they are quite inexpensive—you should be able to get them for anywhere from $4-$10 each. You could of course use them as they are, but this project will help you make them pretty! To do that, you need the top of the light, a Mason jar with a relatively wide mouth, some gorilla glue, and a couple of cups of glass gems. The light will shine down into the jar at night and reflect inside the glass gems, making it look like they are glowing. Just think how beautiful it would look if you had a row of these with different colors of glass gems!
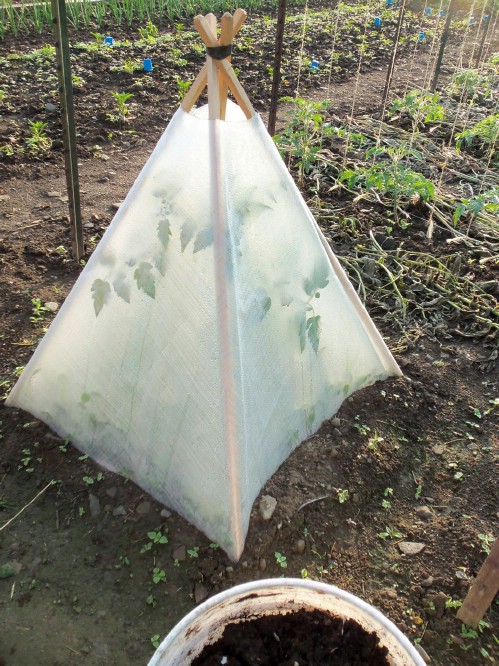 Speaking of solar, here is a solar project that isn’t for lighting purposes. It doesn’t use solar power to create electricity, but it does harness the power of the sun to help your plants grow in the spring. These solar pyramids were designed by Herrick Kimball of the blog Deliberate Agrarian. In a sense, each solar pyramid functions as a miniature greenhouse. Apparently these pyramids are so good at capturing condensation that you do not have to worry about watering your plants after you get them set up. Wow!
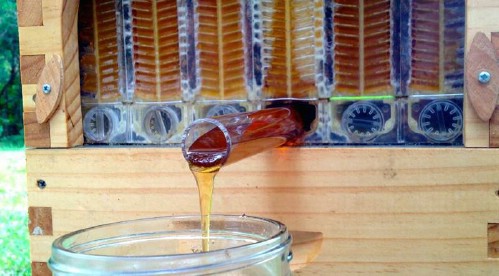 If you have an interest in beekeeping, you should check out this very cool design for a beehive. This design is known as the “flow hive,” and was developed by Cedar Anderson and Stuart Anderson. The frames have open cells; this allows the honey to flow out of a pipe for harvest. That means you do not have to pull the frames out yourself. The bees are not disturbed and neither are you. This is both bee-friendly and human-friendly. While there are no instructions for how to do it, there is a video, and if you are industrious and creative, this may give you some great ideas for how you can redesign your own hive.
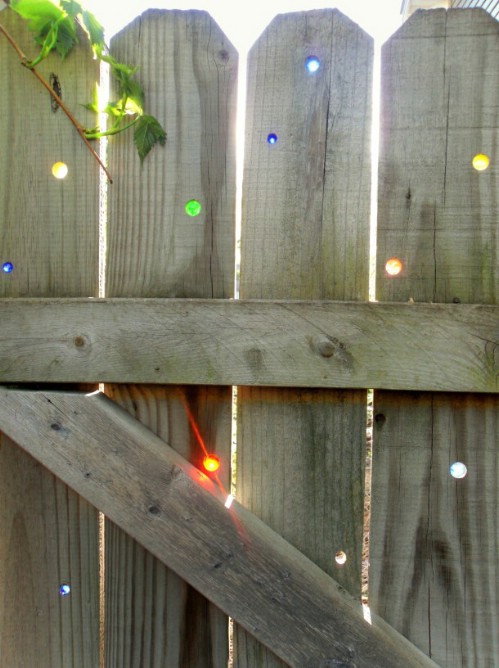 This is such a cute and clever idea for adding some color and pizzazz to your backyard! If you have a wooden fence, just create patterns of holes, as many or as few as you would like, and then push marbles inside. So long as you do a good job with the sizing of the holes, you shouldn’t need any sort of glue to hold them in place. For the best results, go with a west-facing fence. That way when the sun sets, the marbles will all glow with color!
 While this lamppost looks quite sophisticated, it is actually apparently a very easy project which you can complete in a couple of days with some basic supplies. The total cost is around $150. Thanks to This Old House for this one!
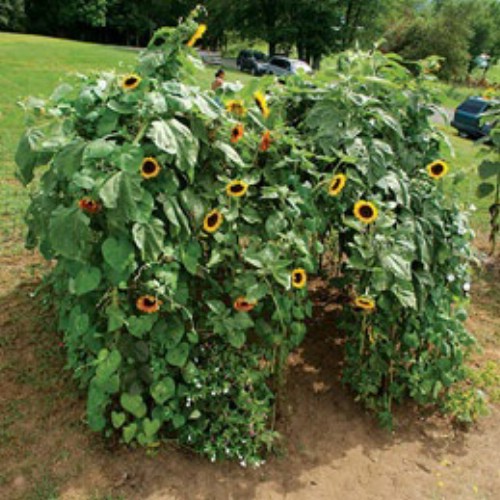 While it is not obvious from the photograph, this will eventually grow into a sunflower “playhouse.” The round design and the choice of tall plants essentially will turn it into a screened-off “room” in the backyard. This is perfect for children to play in, and makes a great alternative to something like a tree-house if you cannot build one. Your kids will love it so much they will be in it all the time, so as a bonus, you will always know where they are!
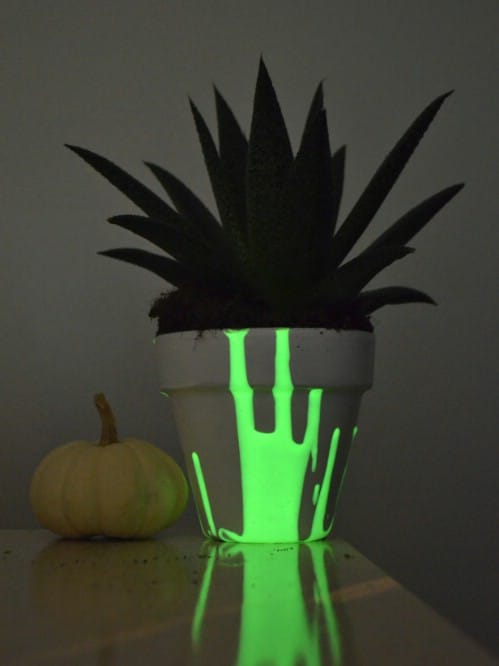 Why settle for a boring old plastic planter? You can purchase glow-in-the-dark paint and add it to your planters for easy outdoor lighting. When the sun sets each night, they will glow! Imagine a series of these along a garden pathway or lining the edge of a patio or deck. You could use just a splash of glow-in-the-dark color like this, paint the entire planters, or create designs on each one. You can use any colors you choose. This would be a fun project to do with your kids.
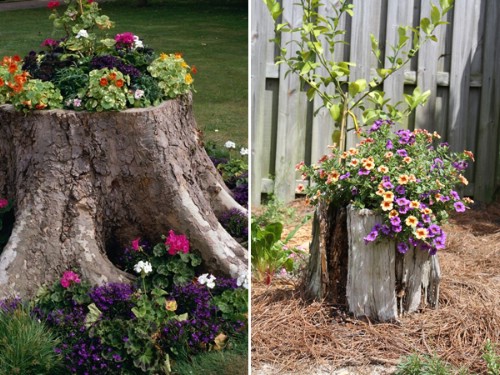 Old tree stumps don’t have to just sit in your yard taking up space. You can turn them into something magical and beautiful with a few easy steps. This
  Here is an interesting feature you can add to your garden. It’s low maintenance once you have it set up, and it can give your garden a wilder look. Depending on the stones you choose, you might be able to have it double as a pathway too. Click here to see more photos of dry creek beds you can create along with some helpful tips and tricks.
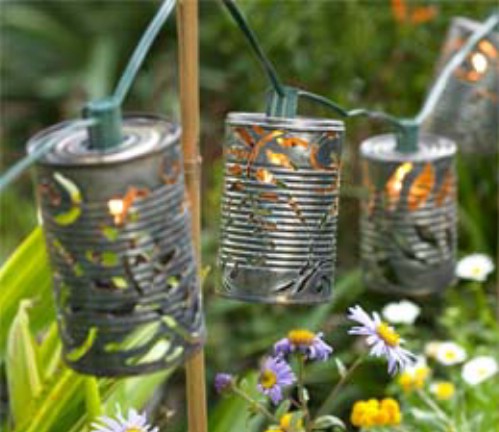 You can actually purchase these cute lights for your garden. If you have the tools, they might be something you could make from scratch as well. It is certainly a good use to put old tin cans to!
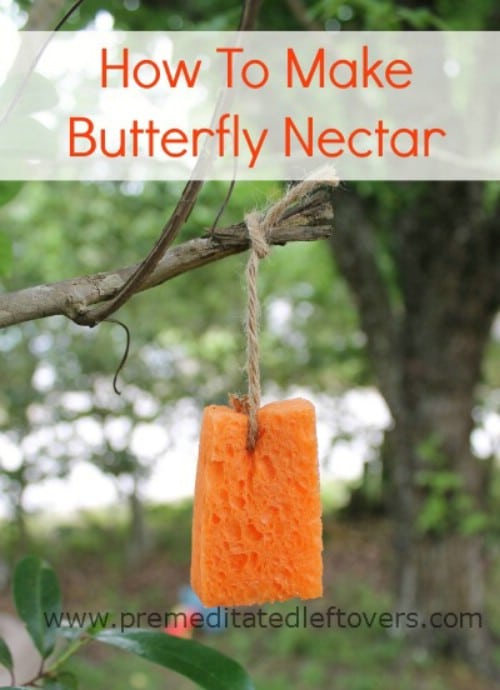 This
This 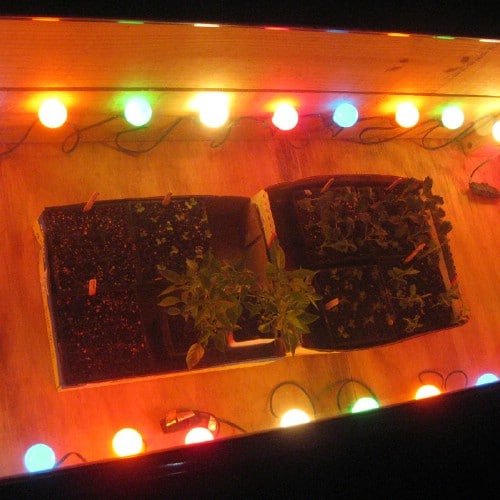 If you are looking for a way to extend the growing season and keep your seedlings warm during the cooler days and nights of early spring, then don’t put away your holiday lights after Christmas. Instead, add them to your seedling box! They will provide just enough warmth to protect your seedlings, even if you are dealing with freezing temperatures outside. What a clever way to make use of Christmas lights in an unexpected way!
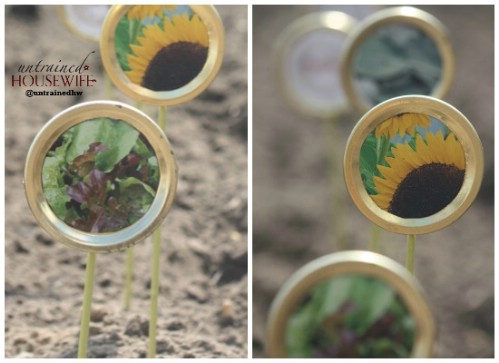 Earlier in the list, I shared a couple of cool ideas for creating seed labels. I really love these canning labels. They look nice and neat, they allow you to recycle, and best of all, you can add images to them and not just words! This is perfect if you are more of a visual thinker. Personally I’d find it much easier to find my way around my seedbed if I labeled like this instead of using words. Each of these little lids is like a window in the future of your garden!
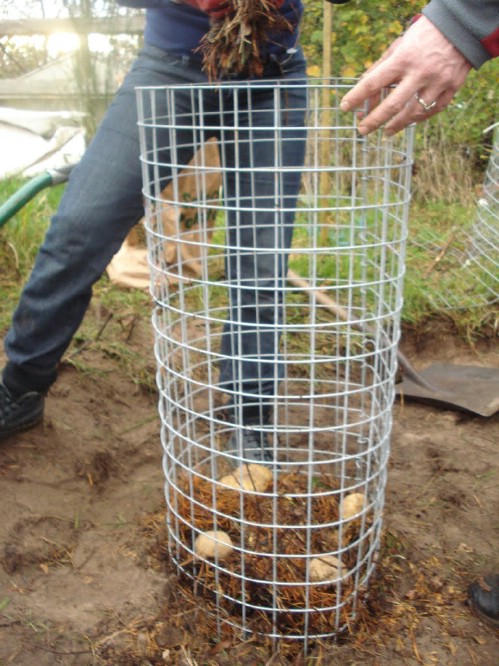 If you have limited lawn space, vertical gardening is the best way to use the room you do have available. According to Kathleen Jackson at
 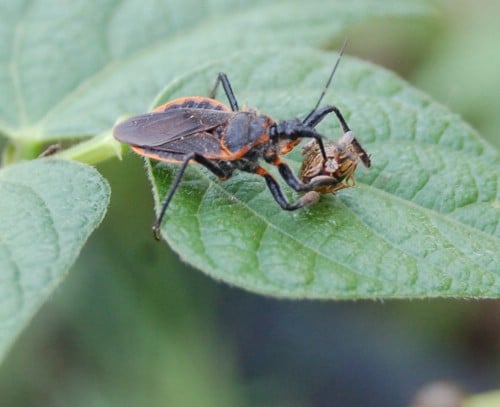 This milk jug from Walter Reeves has to be one of the easiest pest control ideas I have ever seen. Just coat an empty jug with a bug killer of your choice (try to stick with something organic), and put the milk jug up on a post. Bugs will stick to the container and die. You can wash them off and do it again.
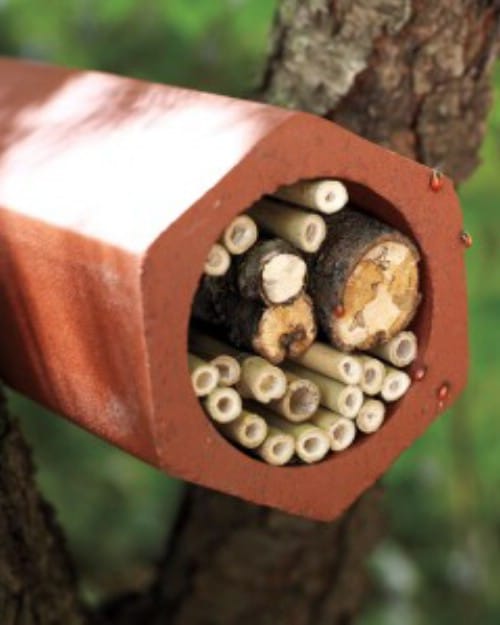 Then again, sometimes you want to attract bugs to your garden! Ladybugs are big helpers for gardeners, which is why you can order them through the mail if you want. A simple and less expensive alternative is to build a habitat to attract them. Just get a hollow pipe and fill it with bamboo, scrap wood, or something similar. Then place it in your garden somewhere convenient. The ladybugs will love making homes out of the little hollow spaces inside. If you do order ladybugs online, I suggest building this home for them anyway—that way they will want to stay in your garden!
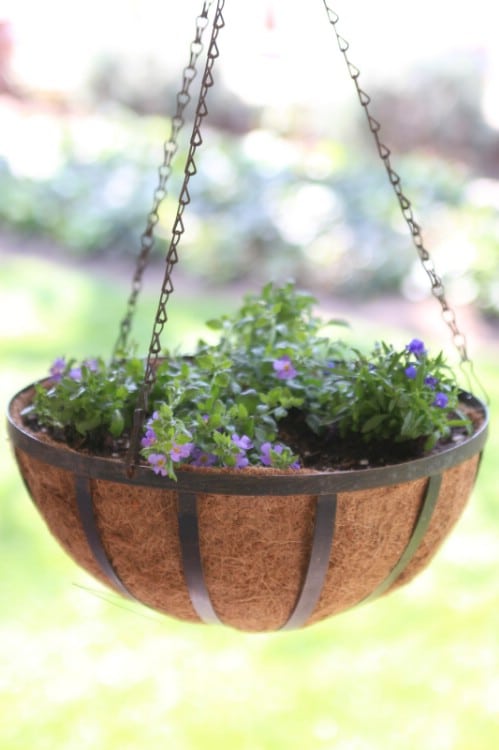
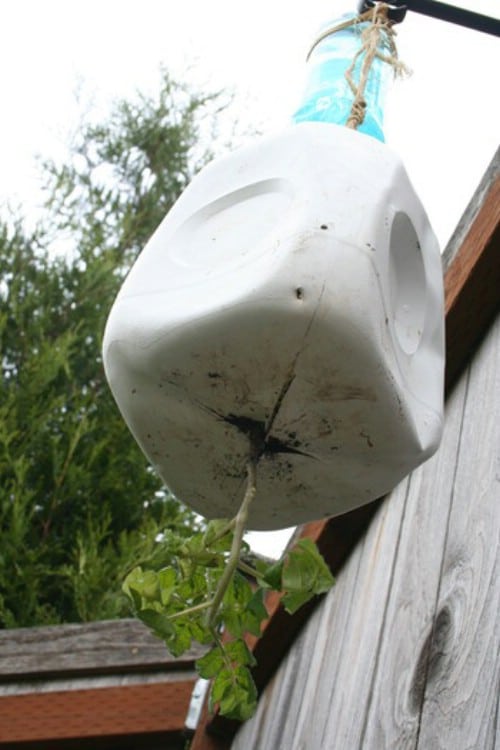 Another trick for vertical gardening is to use overhead space. If you have a deck for example or a porch, and you can hang a hook, you can create a hanging tomato planter. While there are no step-by-step instructions, the materials and design look simple enough to replicate.